Pokémon Crochet Pattern - Charmander
Crochet Your Own Charmander Plushie (Free Pattern + Video Tutorials!)
If you're a fan of Pokémon and adorable plushies, you're going to love this beginner-friendly Charmander crochet pattern. Soft, squishy, and super cute, this amigurumi project is great for new crocheters and experienced makers. It's a quick and fun project!
What's make this pattern extra beginner friendly is a written step by step pattern AND a full video tutorial!
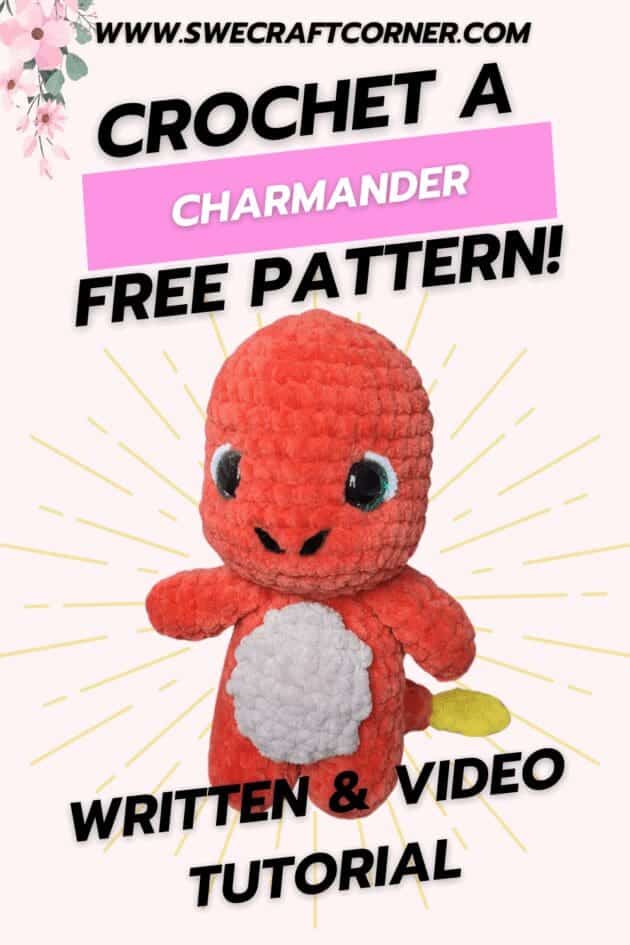
This handmade version of a popular fire-type Pokémon is made for cuddles! It uses super soft chenille yarn, giving it a delightful squish that kids and collectors love. Whether you're crocheting a gift for a Pokémon-loving child, adding to your geeky home decor, or just feeding your inner nostalgic heart, this project will definitely light your crochet flame.
What makes this pattern extra fun is how cozy it feels to work with chenille yarn. It’s fluffy, soft on the hands, and creates a beautiful texture—perfect for plushies and stuffed animals. That said, chenille yarn can be a bit tricky if you’re new to it! It doesn’t show the same stitch definition as cotton or acrylic yarns. This can make it tricky to see where to insert your hook.

Pro tip:
Use a stitch marker and work in good lighting, especially when crocheting with chenille yarn. If you’re brand new to it, practice with a small swatch first—or grab a second skein for experimenting!
This plushie is made in parts—arms, legs, head, body, tail, and details—then assembled at the end. Each part is beginner-friendly, and if you prefer learning by video, I’ve got you covered with a 3-part YouTube series linked below!
Save this post for later or pin it to your Amigurumi Crochet board on Pinterest!
Video Tutorials
To make your crochet journey even easier, I’ve broken down this pattern into 3 full YouTube tutorials:
- Arms & Legs Tutorial – Step-by-step for making the limbs
- Body & Head Tutorial – Learn how to crochet and shape the body
- Details & Assembly Tutorial – Attaching pieces, facial details, and that signature flame!
Don’t forget to like, comment, and subscribe to my YouTube channel for more cute plushie patterns!
Share Your Charmander!
I’d love to see your finished plushies! Tag me on Instagram @swecraftcorner or use the hashtag #swecraftcorner so I can feature your makes.
Disclaimers & Copyright
This pattern is for personal use only. You may sell finished items made from this pattern, but please credit SweCraftCorner as the designer. Do not reproduce, distribute, or repost this pattern as your own.
As an affiliate for various brands, I may earn from qualifying purchases at no extra cost to you. Thank you for supporting my crochet business!
Charmander Plushie Crochet Pattern
Bring your favorite fire-type friend to life with this adorable Charmander plushie! Made with soft chenille yarn and stuffed for squishy cuddliness, this beginner-friendly amigurumi is a fun and fast project.
Finished Size
- Approx. 17 cm (6.7 inches) tall
Materials
- Yarn: Chenille yarn (Paintbox Yarns Chenille or similar)
- Orange – 1 skein
- Small amounts of: Beige, Black, White, Yellow
- Crochet hook: 5.0 mm
- Other:
- Tapestry needle
- Fiber fill
- 16 mm safety eyes
Pattern Notes
- This pattern is worked in continuous rounds unless otherwise stated. Use a stitch marker to keep track of your rounds.
- Safety eyes are placed between rounds 9 and 10, with approximately 7 stitches between them.
- The arms and legs are made separately and then crocheted together when forming the body.
- Use a tapestry needle to sew parts together securely.
- Gauge is not critical for this project, but keep your stitches tight to prevent stuffing from showing.
Abbreviations (US Terms)
| Abbreviation | Meaning |
| mr | Magic ring |
| sc | Single crochet |
| inc | Increase (2 sc in 1 st) |
| sc2tog | Single crochet 2 stitches together (decrease) |
| ch | Chain |
| st(s) | Stitch(es) |
| tog | Together |
Instructions
Arms (make 2
Using orange yarn and 5,0mm crochet hook, make a magic ring
Round 1: 5 sc in mr (5)
Round 2: inc in each st around (10)
Rounds 3–6: sc in each st (10)
Round 7: Fold the top flat and crochet across to close: sc2tog, sc, sc2tog through both layers.
Fasten off and weave in ends.
Legs (make 2)
Using orange yarn and 5,0mm crochet hook, make a magic ring
Round 1: 6 sc in mr (6)
Round 2: inc in each st around (12)
Rounds 3–4: sc in each st (12)
First leg: Fasten off, leaving all sts workable.
Second leg: Repeat Rounds 1–4 but do not fasten off. Continue to join the legs with the instructions for the body:
Body
Round 5: Sc around first leg (12 sts), then sc around second leg (12 sts) – 24 sts total
Would you like to save this?
Round 6: [inc, 11 sc] x 2 (26)
Rounds 7–10: sc in each st (26)
Round 11: [sc2tog, 11 sc] x 2 (24)
Round 12: sc in each st (24)
Round 13: [2 sc, sc2tog] x 6 (18)
Round 14: sc in each st (18)
Round 15: sc, sc2tog, sc
→ Insert arm: sc2tog through arm and body, sc
→ [sc2tog, sc] x 2
→ Insert second arm: sc2tog through arm and body, sc, sc2tog (12)
stuff the body firmly
Round 16: [sc2tog] x 6 (6)
Head
Using orange yarn and 5,0mm crochet hook, make a magic ring
Round 1: 8 sc in mr (8)
Round 2: inc in each st (16)
Round 3: [sc, inc] x 8 (24)
Round 4: sc in each st (24)
Round 5: [2 sc, inc] x 8 (32)
Rounds 6–10: sc in each st (32)
Round 11: 12 sc, [inc, 3 sc] x 4, 4 sc (36)
Round 12: sc in each st (36)
Round 13: [sc2tog, 4 sc] x 6 (30)
Round 14: [3 sc, sc2tog] x 6 (24)
Insert safety eyes between rounds 9 and 10, approx. 7 sts apart
Round 15: [sc2tog, 2 sc] x 6 (18)
Round 16: [sc, sc2tog] x 6 (12)
Stuff the head firmly
Round 17: [sc2tog] x 6 (6)
Fasten off and close.
Belly
Using beige yarn and 5,0mm crochet hook
Row 1: Ch 2, 2 sc in 2nd ch from hook (2), ch 1, turn
Row 2: inc in each st (4), ch 1, turn
Row 3: inc, 2 sc, inc (6), ch 1, turn
Rows 4–7: sc across (6), ch 1, turn
Row 8: sc2tog, 2 sc, sc2tog (4), ch 1, turn
Row 9: [sc2tog] x 2 (2), ch 1, turn
Row 10: sc2tog (1)
Fasten off, leaving a tail for sewing.
Tail
Using orange yarn and 5,0mm crochet hook, make a magic ring
Round 1: 6 sc in mr (6)
Rounds 2–3: sc in each st (6)
Round 4: inc, 5 sc (7)
Round 5: inc, 6 sc (8)
Round 6: inc, 7 sc (9)
Round 7: inc, 8 sc (10)
Round 8: inc, 4 sc, sc2tog, 3 sc (10)
Round 9: inc, 4 sc, sc2tog, 3 sc (10)
Round 10: inc, 4 sc, sc2tog, 3 sc (10)
Fasten off, leaving a long tail for sewing.
Fire
Using yellow yarn and 5,0mm crochet hook
Row 1: Ch 2, 2 sc in 2nd ch from hook (2), ch 1, turn
Rows 2–3: sc in each st (2), ch 1, turn
Row 4: sc2tog (1)
Fasten off and weave in ends.
Assembly Instructions
- Sew the fire to the tip of the tail, and attach the tail to the lower back of the body.
- Stitch the belly patch onto the front of the body using beige yarn.
- Using black yarn, embroider nostrils, and add white yarn for eye reflections.
- Sew the head onto the body securely.
- Close the hole between the legs using the yarn tail or matching yarn.