
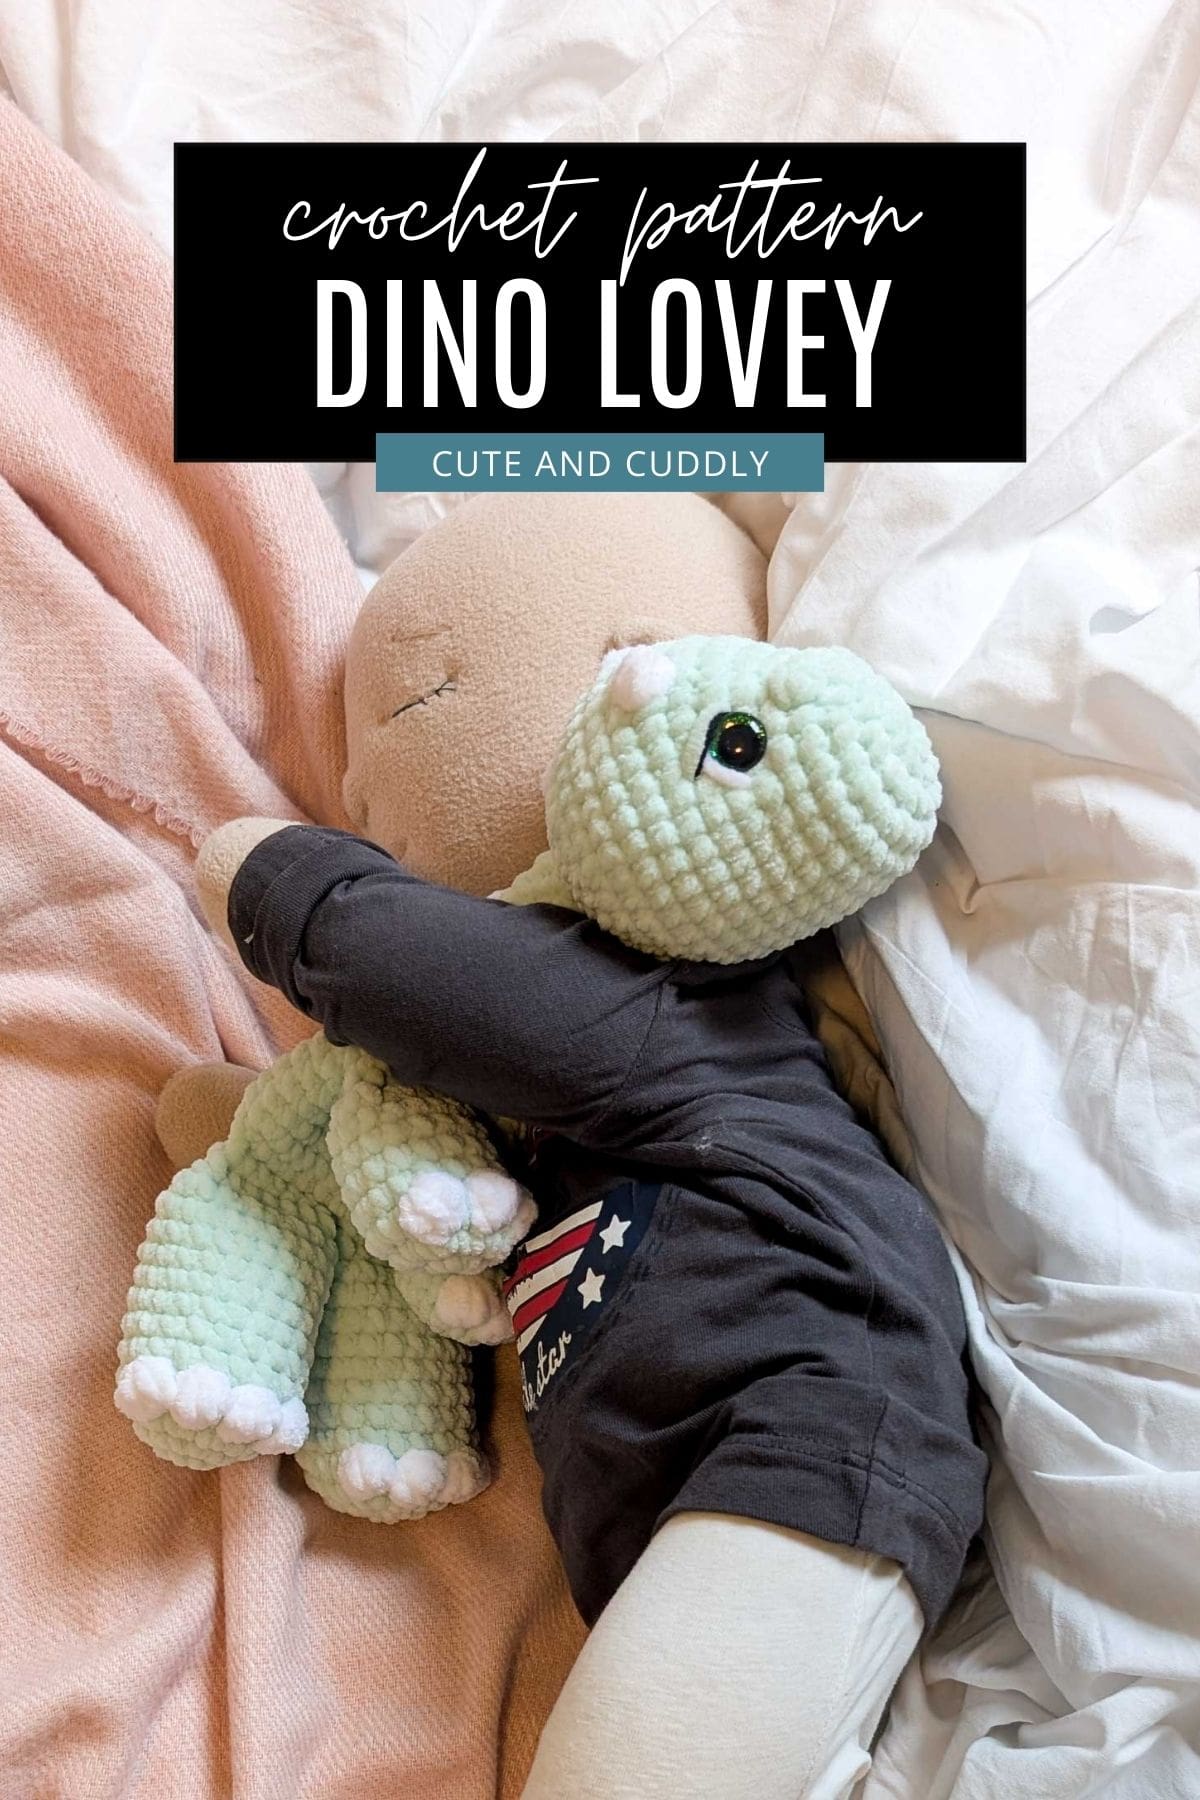
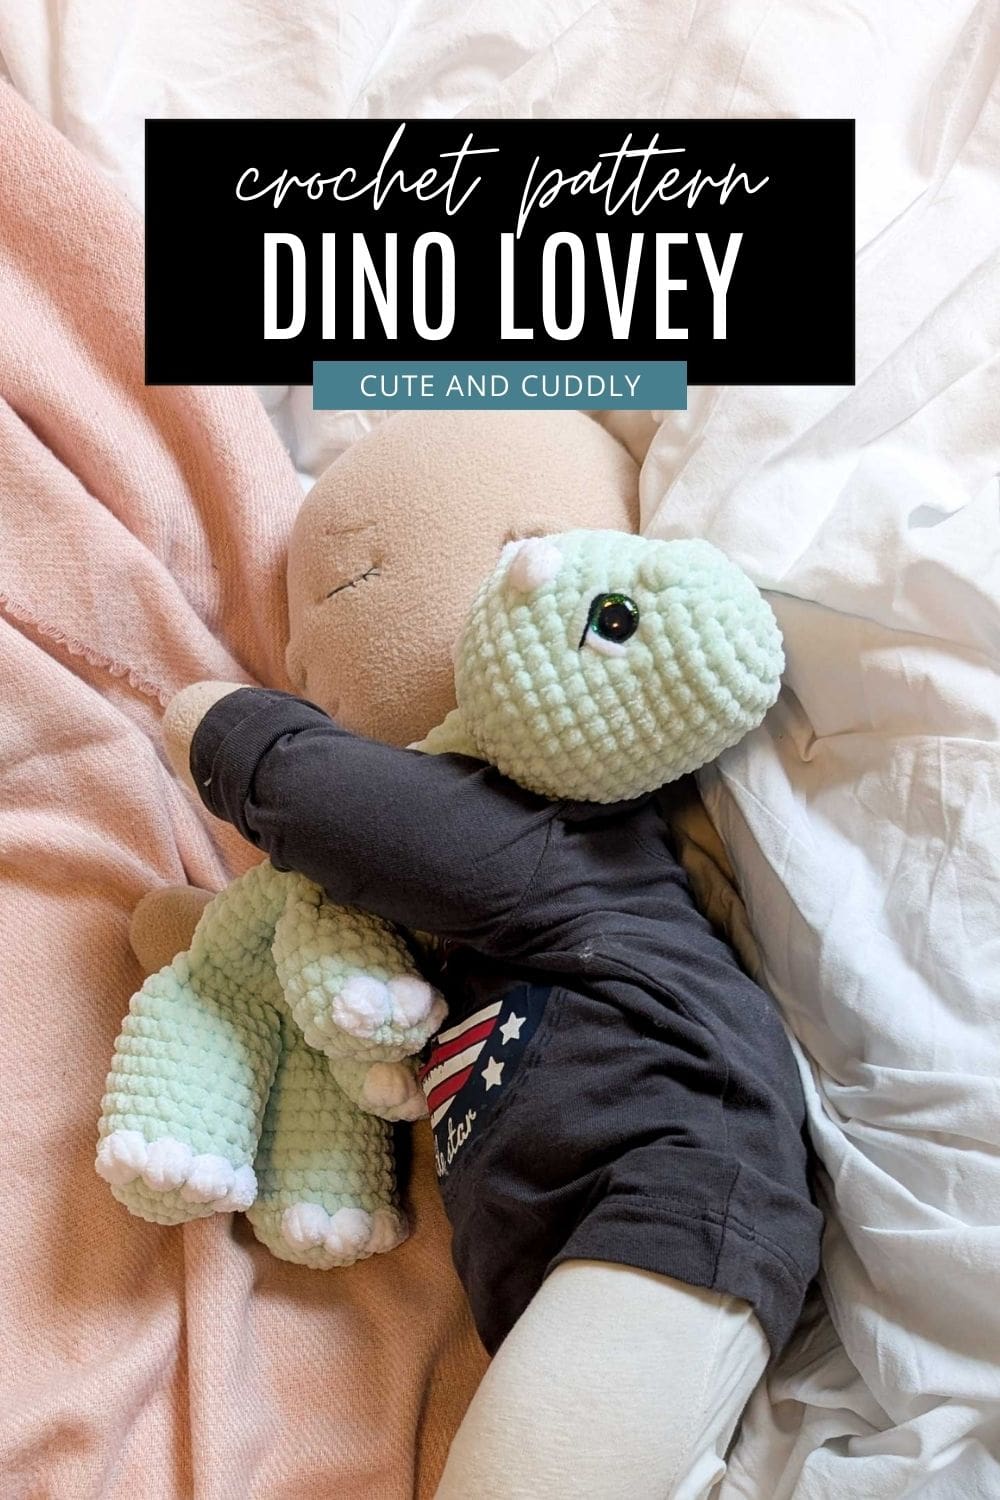
Crochet Dinosaur lovey - adorable free crochet pattern
This dinosaur security blanket is super cozy and fun to make. It uses soft chenille yarn and cute bobble stitches!
dynamic text placeholder
About This Crochet Dinosaur Lovey
If you’re looking for an adorable crochet dinosaur lovey pattern, this soft and snuggly design is perfect for babies, toddlers, and gift-giving. Made with plush chenille yarn and textured bobble stitches, this dinosaur security blanket is both comforting and fun to crochet.
This dinosaur lovey is worked mostly in the round, with the body crocheted directly onto the legs and tail, which means less sewing and a smoother finished look.
- Style: Amigurumi dinosaur lovey
- Yarn Type: Chenille (plush / velvet-style yarn)
- Skill Level: Confident beginner to intermediate
- Great For: Baby gifts, toddler comfort toys, nursery décor
This pattern is worked mostly in the round and is designed to minimize sewing, making it both enjoyable and beginner-friendly.
Why you will love this Dinosaur baby lovey pattern
Pattern information
- Stitch changes and sequence instructions are separated by commas. Example: 1 sc, sc inc, 4 sc means: 1 single crochet in the first stitch, 2 single crochets in the next stitch (increase), 1 single crochet in each of the next 4 stitches.
- Repeats are marked with square brackets [ ] and followed by the number of times to repeat. Example: [1 sc, sc inc] x 3
- Stitch counts are listed at the end of rows or rounds in parentheses — for example: (18 sts).
Skill Level
Confident Beginner / Intermediate
You should be comfortable with:
Single crochet
Increasing and decreasing
Working in the round
Bobble stitches
Love This?
Choose your favorite image and save to your No Content board.

Materials Needed
To make this crochet dinosaur lovey, you will need:
- Chenille yarn in Base Color (main body)
- Chenille yarn in Accent Color (bobble details)
- 4.5 mm crochet hook
- Safety eyes (appropriate size for chenille yarn)
- Polyester fiberfill
- Yarn needle
- Scissors
- Stitch marker (optional)
Crochet Abbreviations (US Terms)
- sc – single crochet
- dc – double crochet
- inc – increase (2 sc in same stitch)
- sc2tog – single crochet 2 stitches together (decrease)
- mr – magic ring
- sl st – slip stitch
- BLO – back loop only
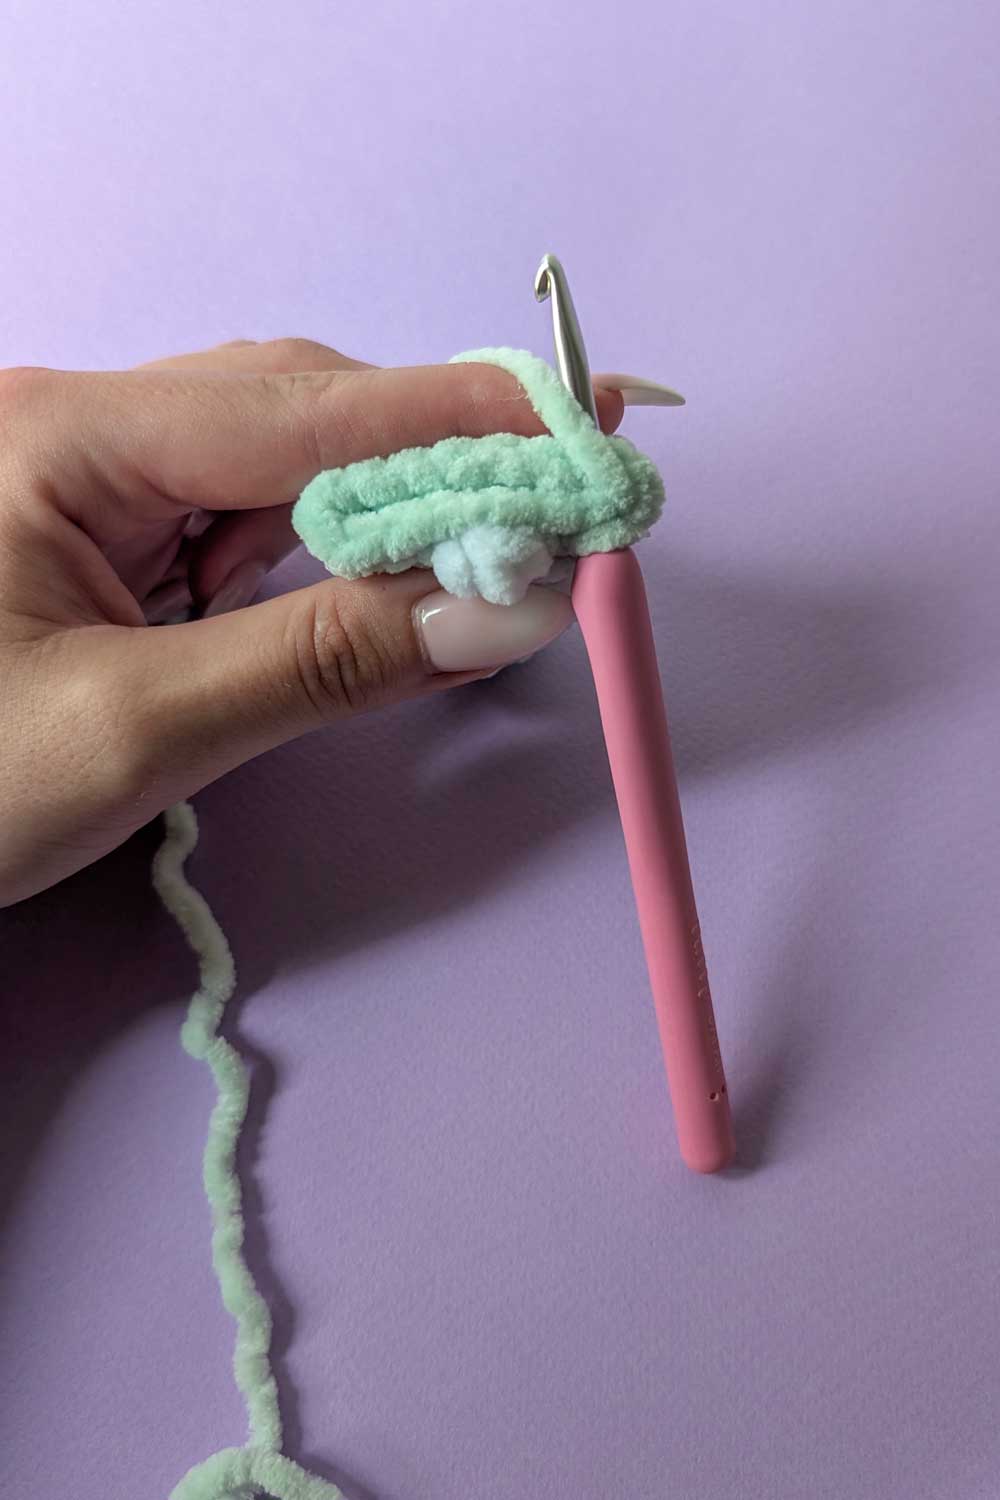
- 4dcBO – 4 double crochet bobble: Yarn over, insert hook into stitch, yarn over and pull up a loop, yarn over and pull through 2 loops, repeat 4 times in the same stitch (5 loops on hook), yarn over and pull through all 5 loops.
- 2dcBO / 3dcBO – same method as 4dcBO, using 2 or 3 dc respectively.
All stitches are written in US crochet terms.
Gauge & Finished size
3 rounds following the pattern below = 2" (5cm) circle
To check your gauge, make a mr using the hook and yarn you are planning on using for this dinosaur crochet lovey.
Round 1: 8 sc in mr (8 sts)
Round 2: inc x 8 (16 sts)
Round 3: [inc, sc] x 8 (24 sts)
The finished size of this lovey is approx. 31 cm from nose to foot
Print it, save it, and crochet without ads.
Want a distraction-free version?
Download the ad-free, printable PDF pattern—perfect for printing or crocheting from your computer, tablet or phone, even offline!
Would you like to save this?
Understanding Basic Crochet Stitches
If you liked this pattern, you may also like these free lovey crochet patterns:
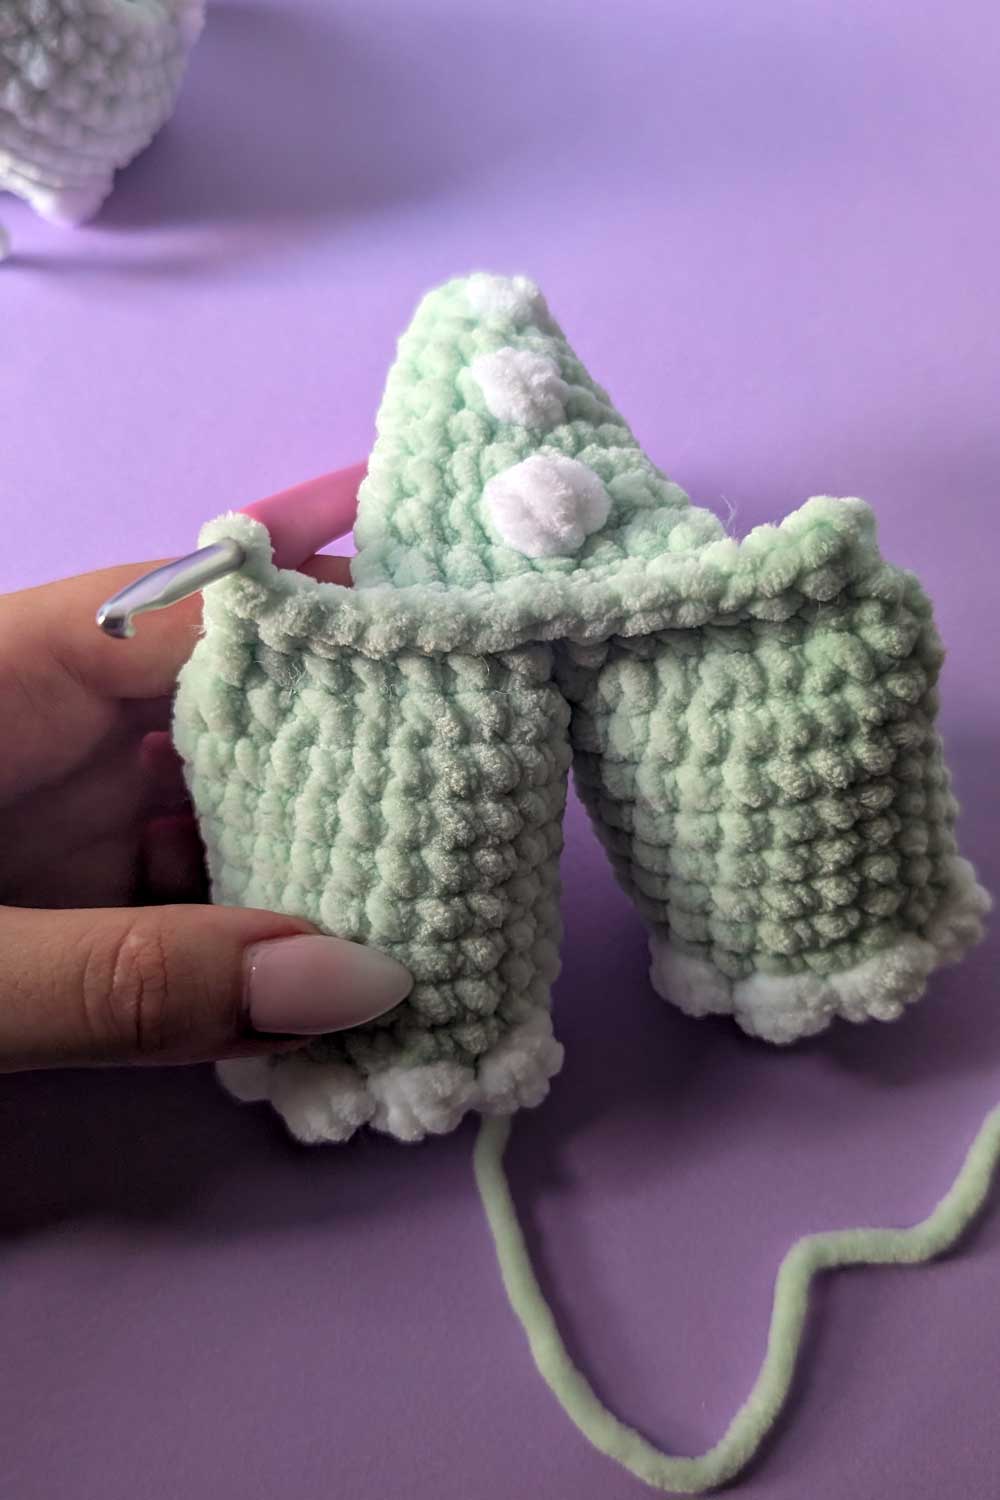
Crochet the front legs
Crochet the back legs
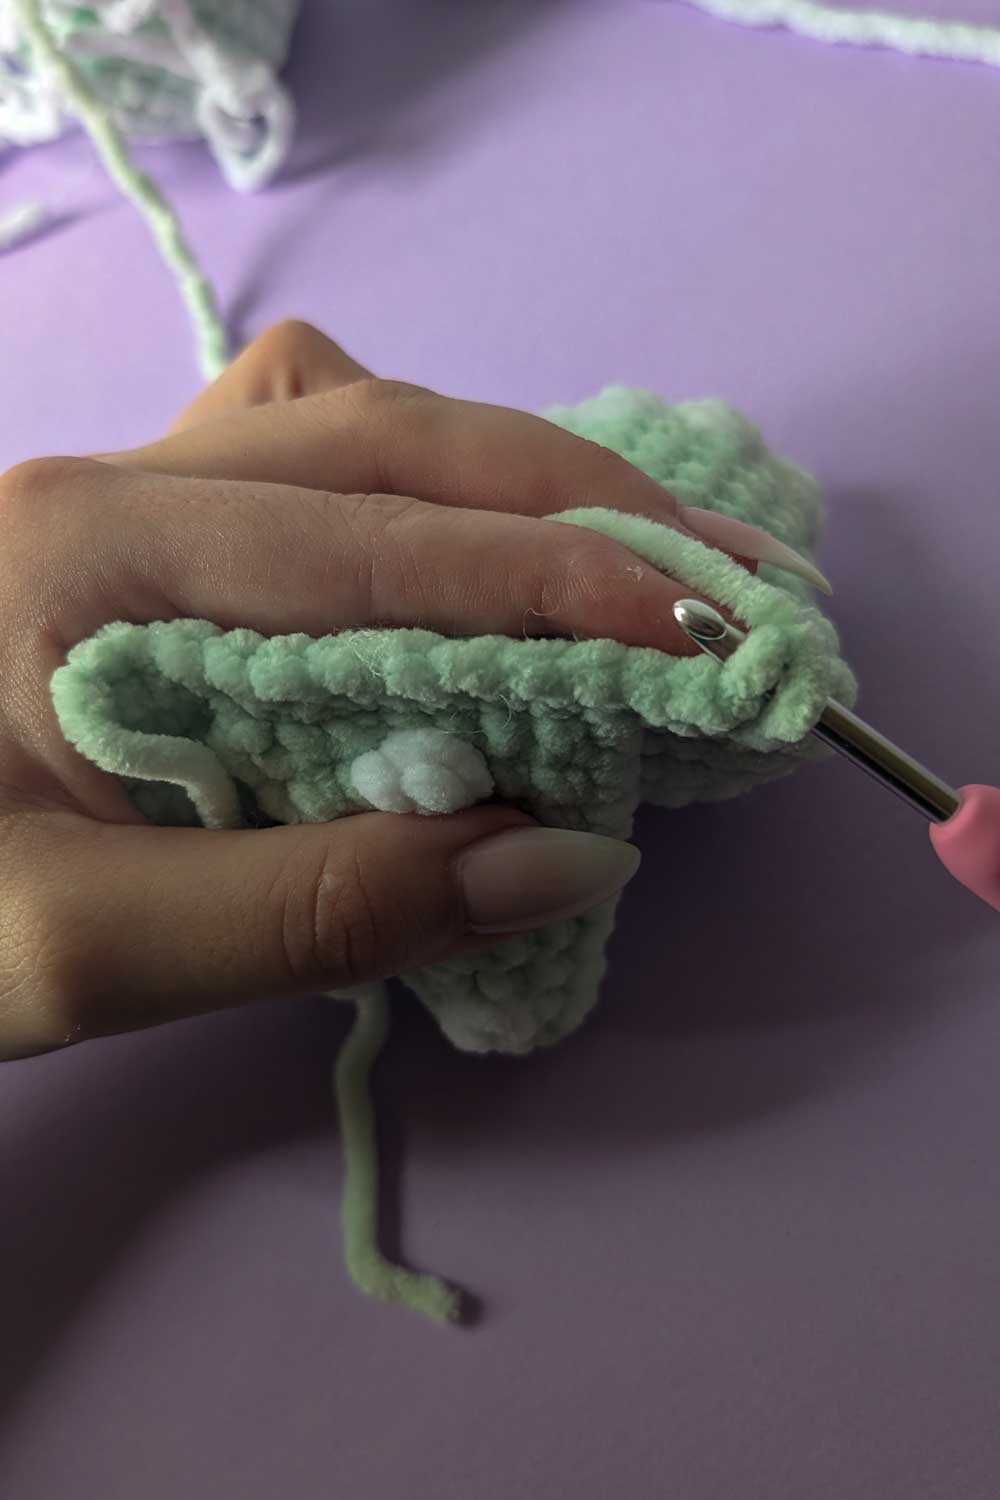
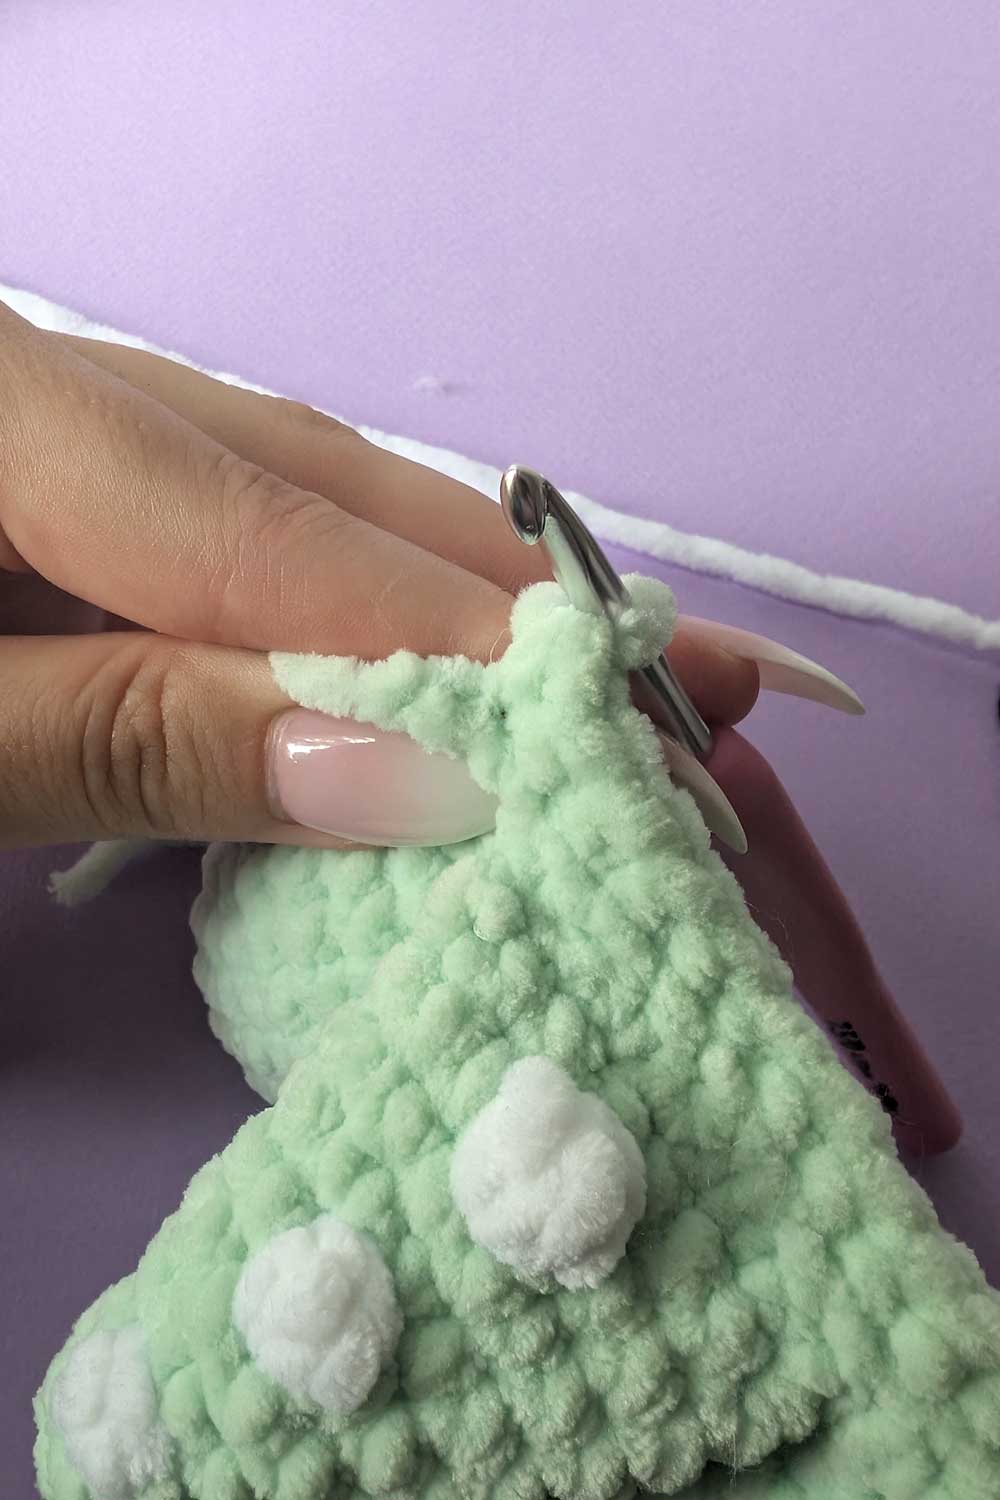
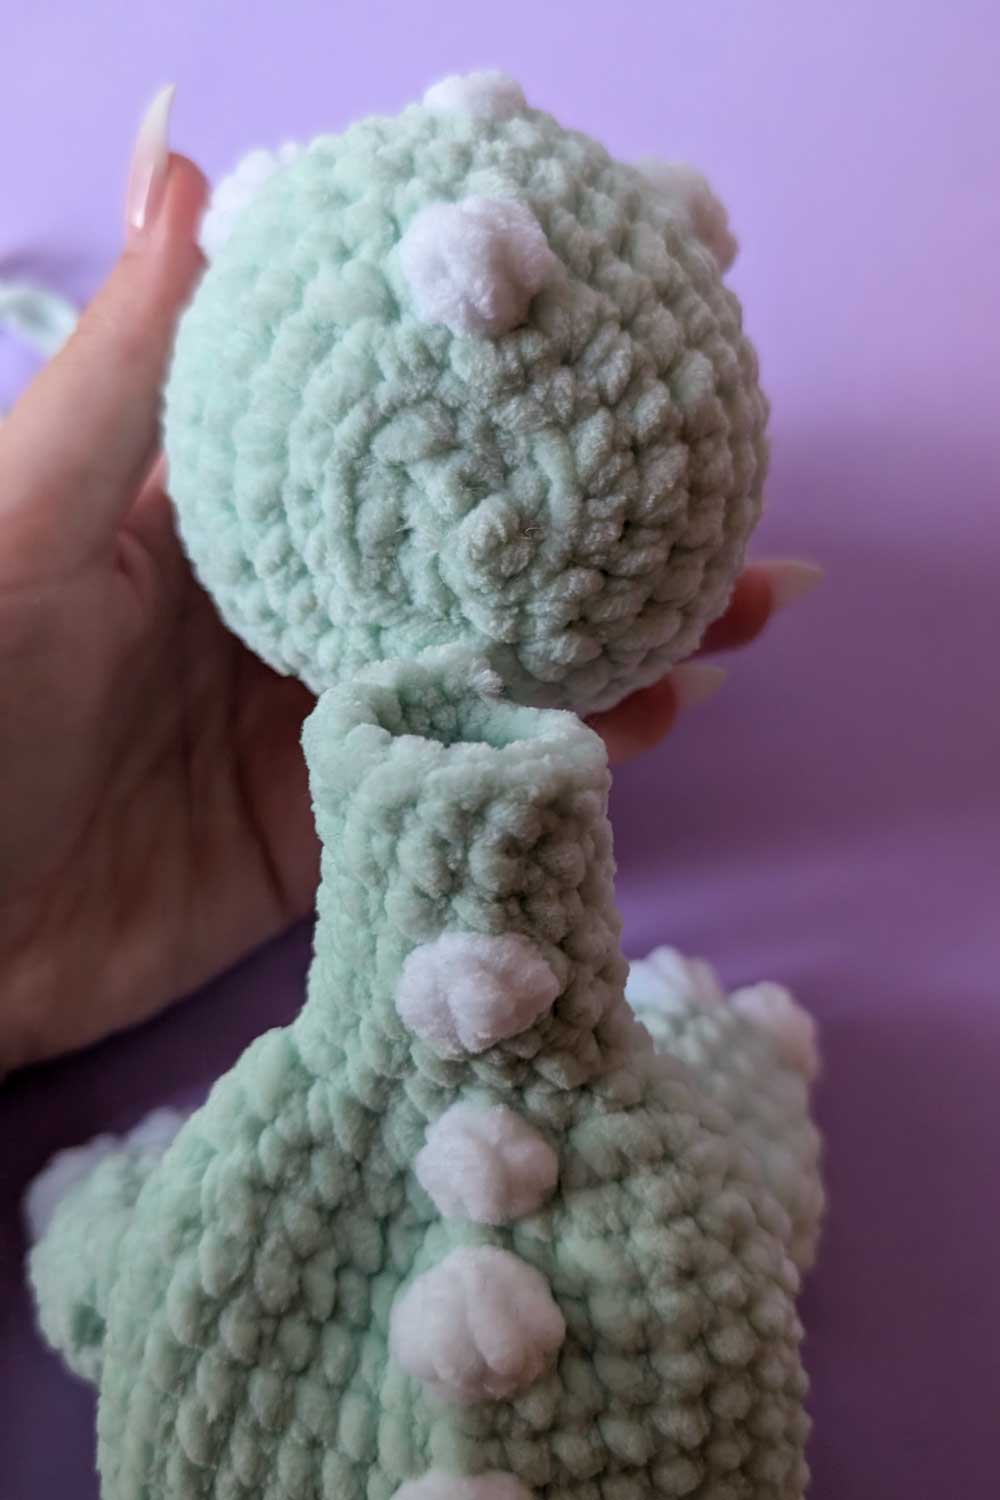
Make the dinosaur head
Prepare the tail
Attach the back legs and tail to form the body base
Crochet the body in the round
As the body grows, the front legs are attached directly into the body during a designated round. This keeps everything secure and evenly placed without additional sewing.
Attach the head to the body
Final adjustments and finishing touches
Safety Disclaimer
This pattern includes instructions for safety eyes.
If making for a baby or child under 3 years old, it is recommended to embroider the eyes instead for safety.
Copyright & Usage
This pattern is for personal use only.
- You may sell finished items made from this pattern.
- Please do not copy, redistribute, or sell this pattern or any part of it. But sharing the link with others is always appreciated!
Crochet Lovey Pattern Instructions
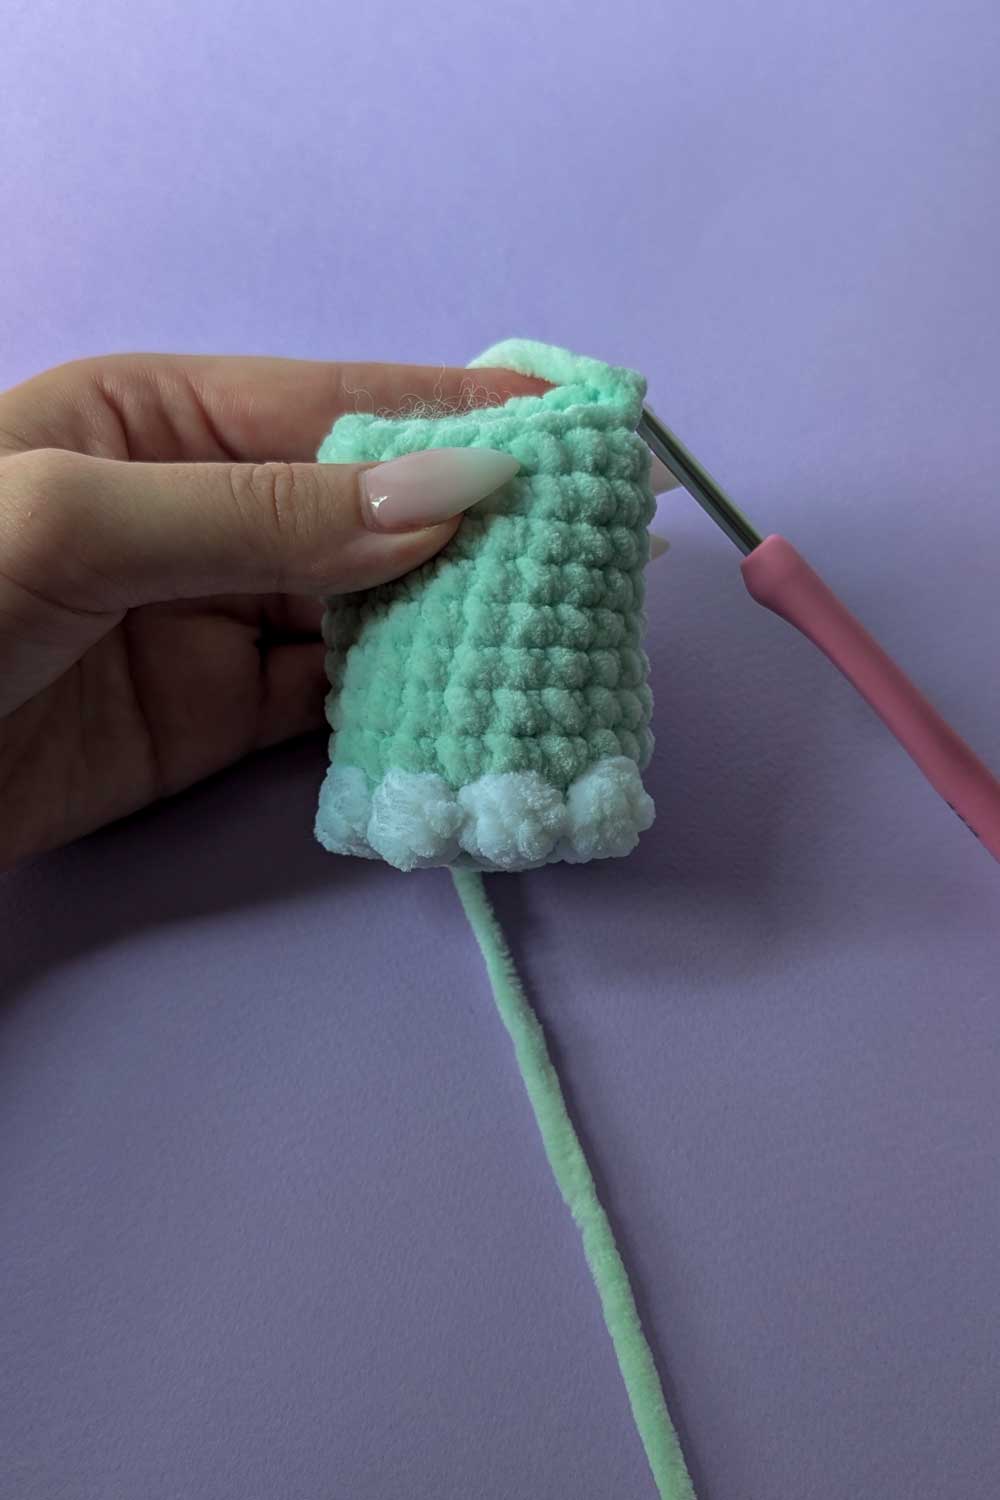
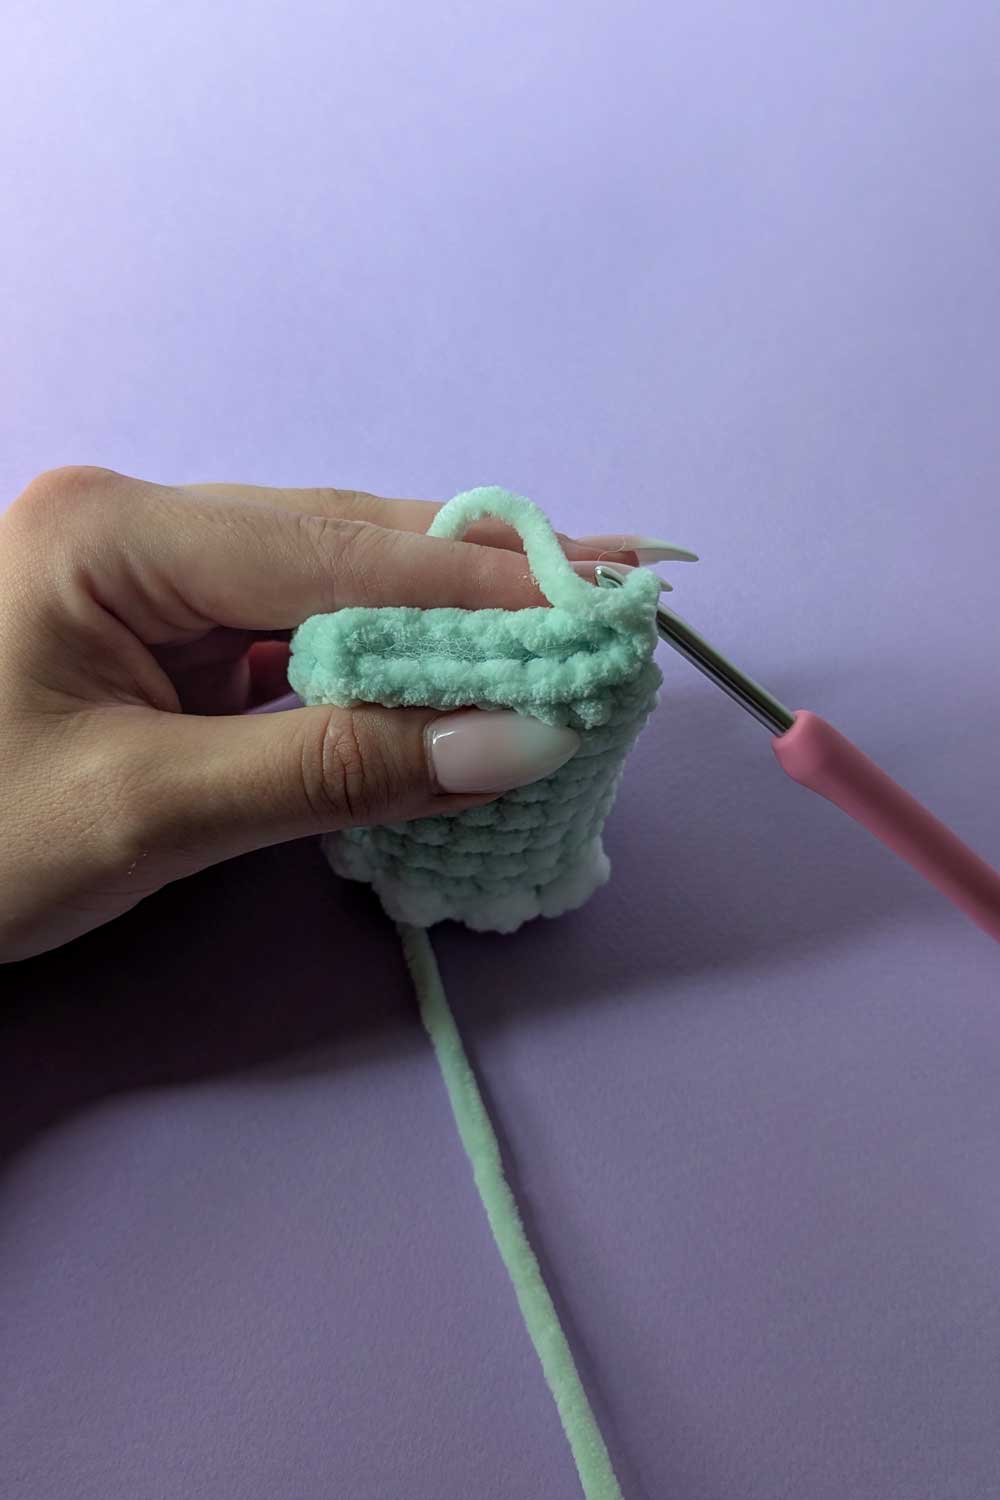
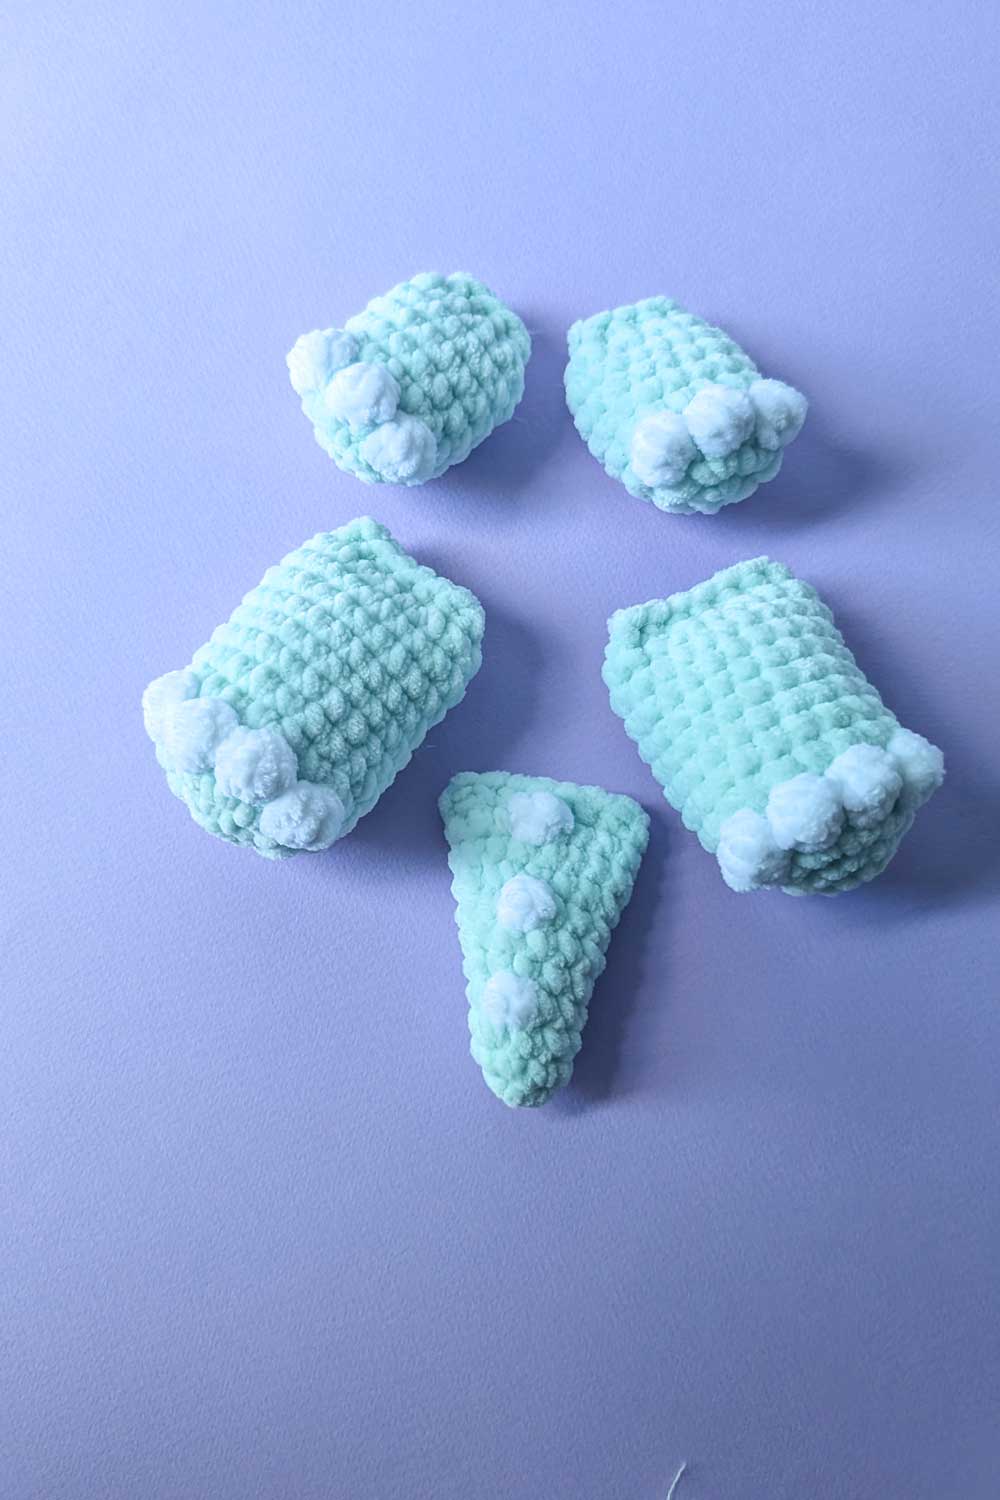
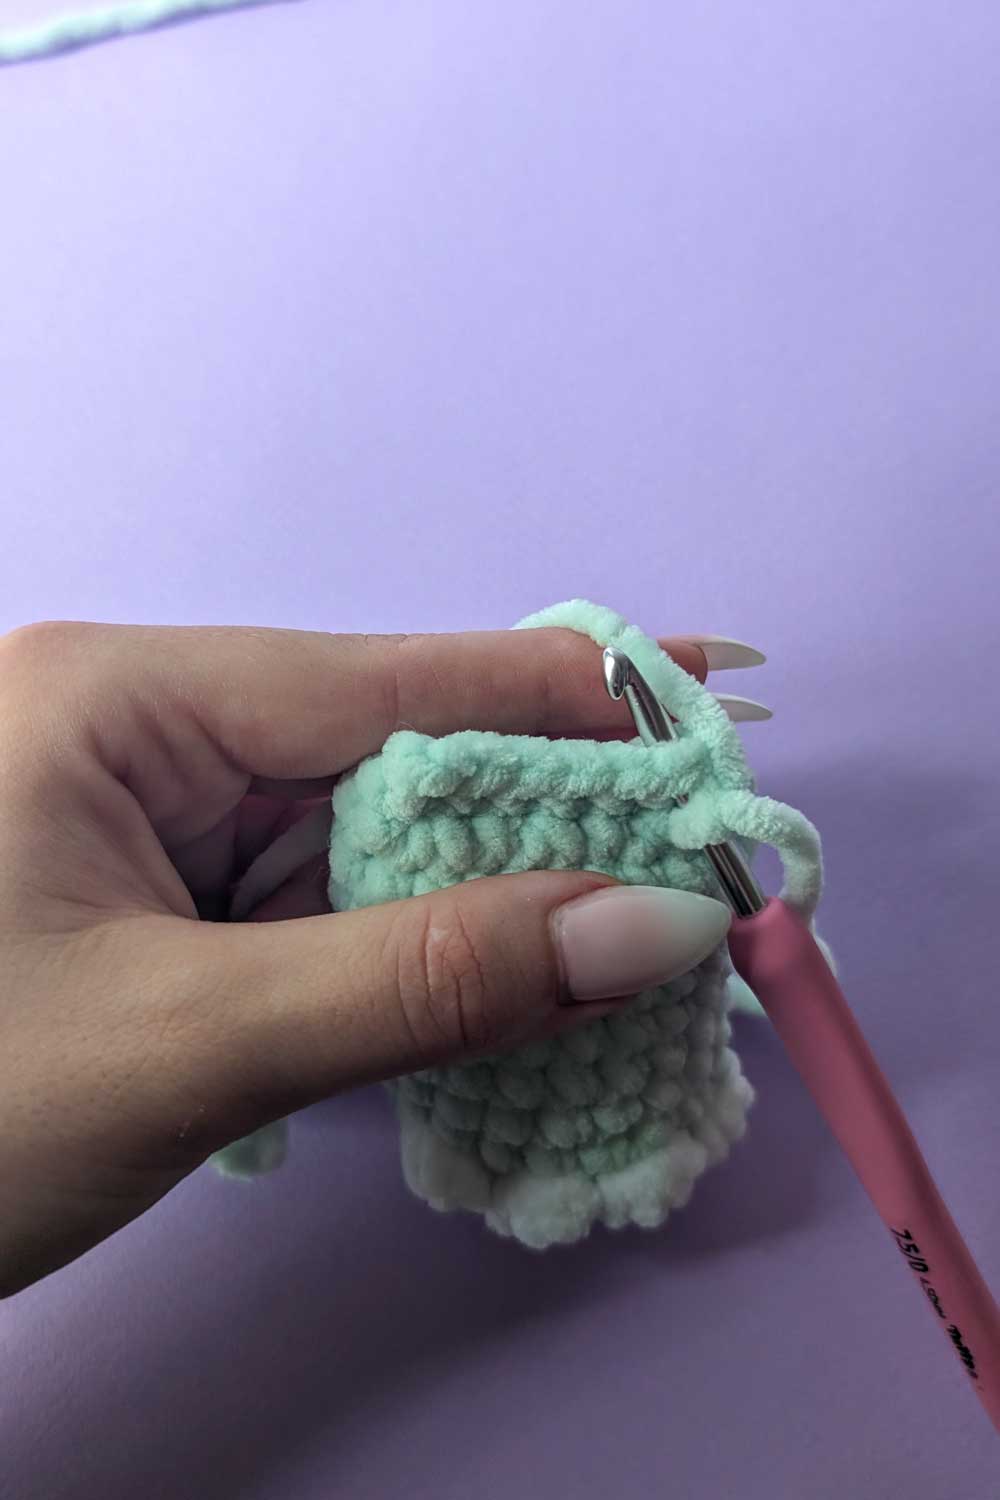
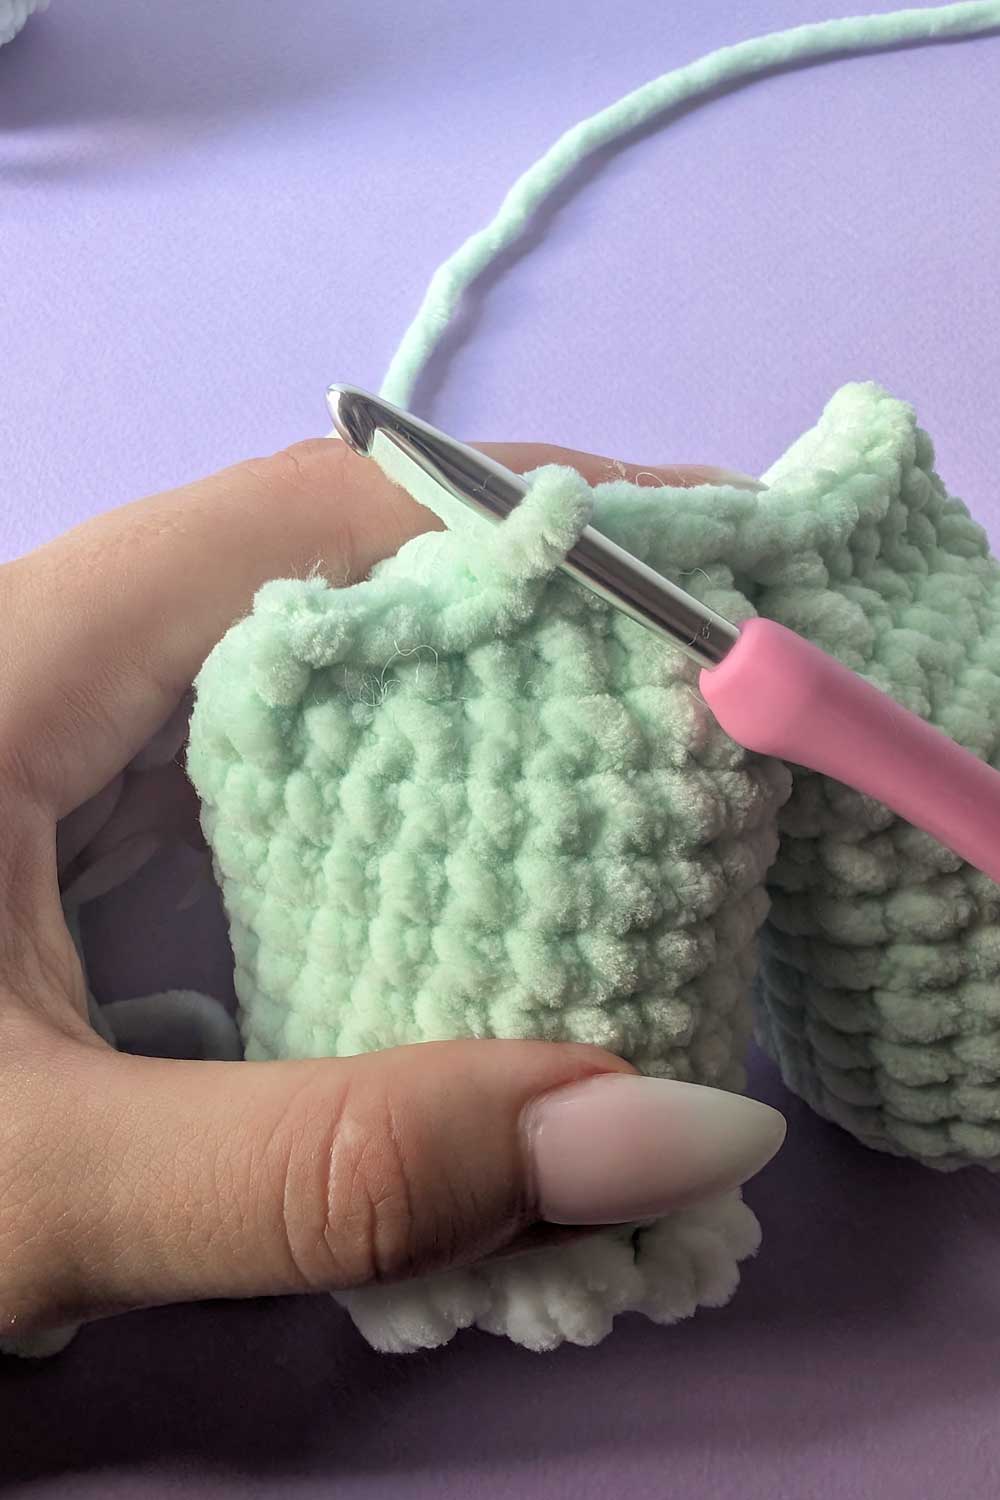
Front leg - make 2
Use Base color chenille yarn and 4.5mm crochet hook for all sc stitches.
Use accent color chenille yarn for bobbles.
Round 1: 8 sc in mr (8 sts)
Round 2: inc x 8 (16 sts)
Round 3: 2 sc, [4dcBO, sc] x 3, 8 sc (16 sts)
Round 4-7: 16 sc (16 sts)
Round 8: sc2tog x 8 (8 sts)
Make alignment stitches if needed, stuff the feet and make 4 sc through both sides

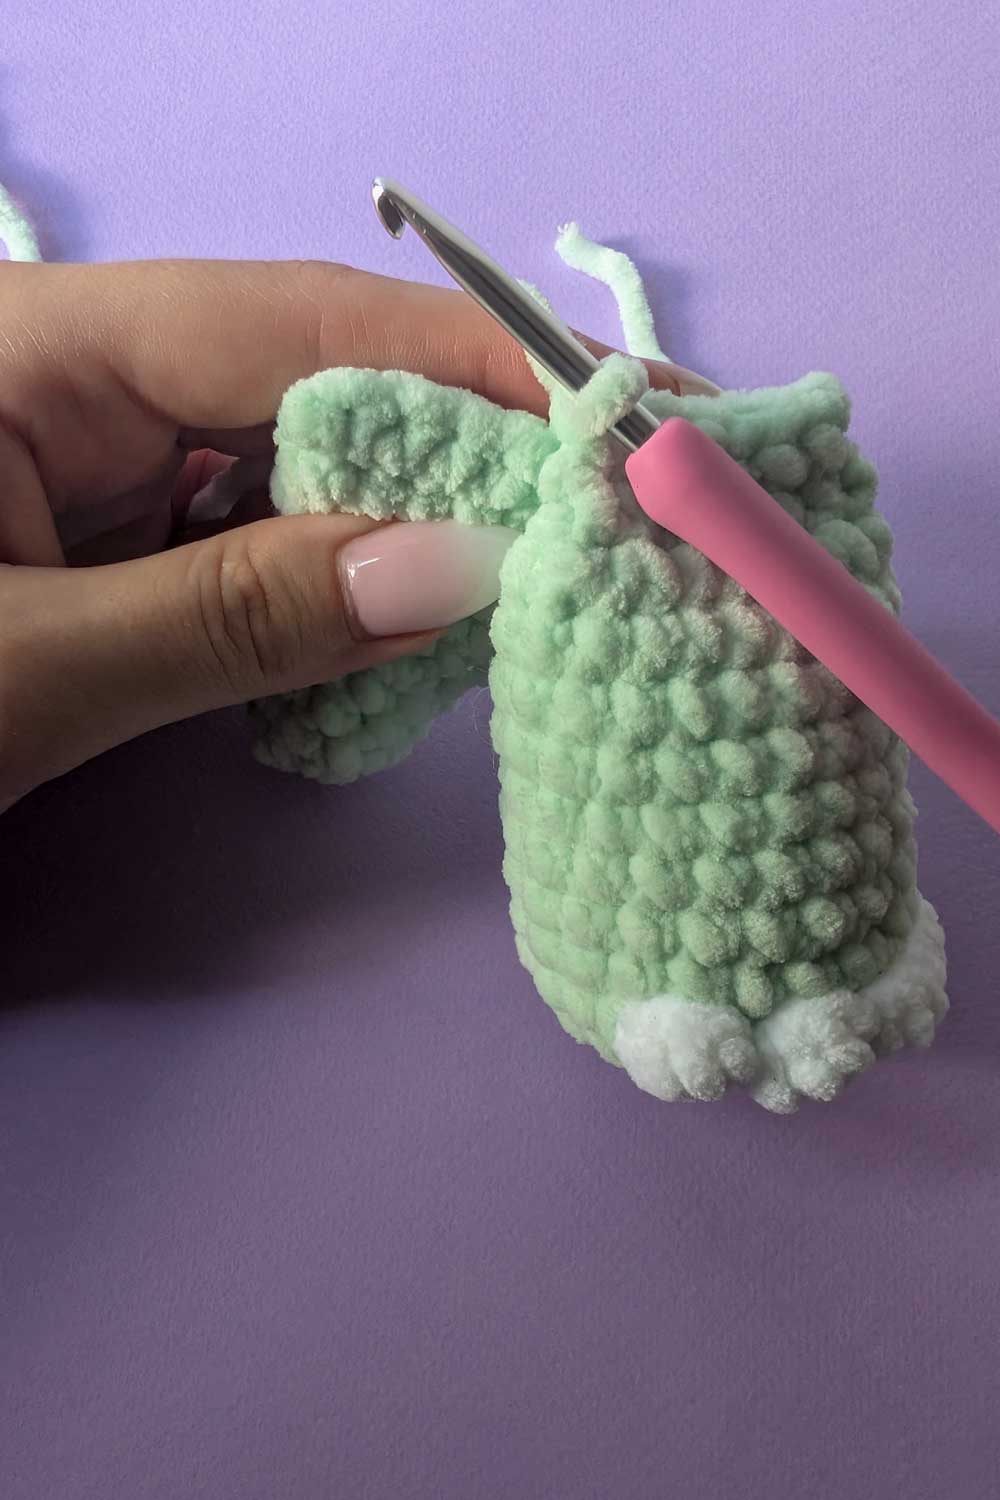
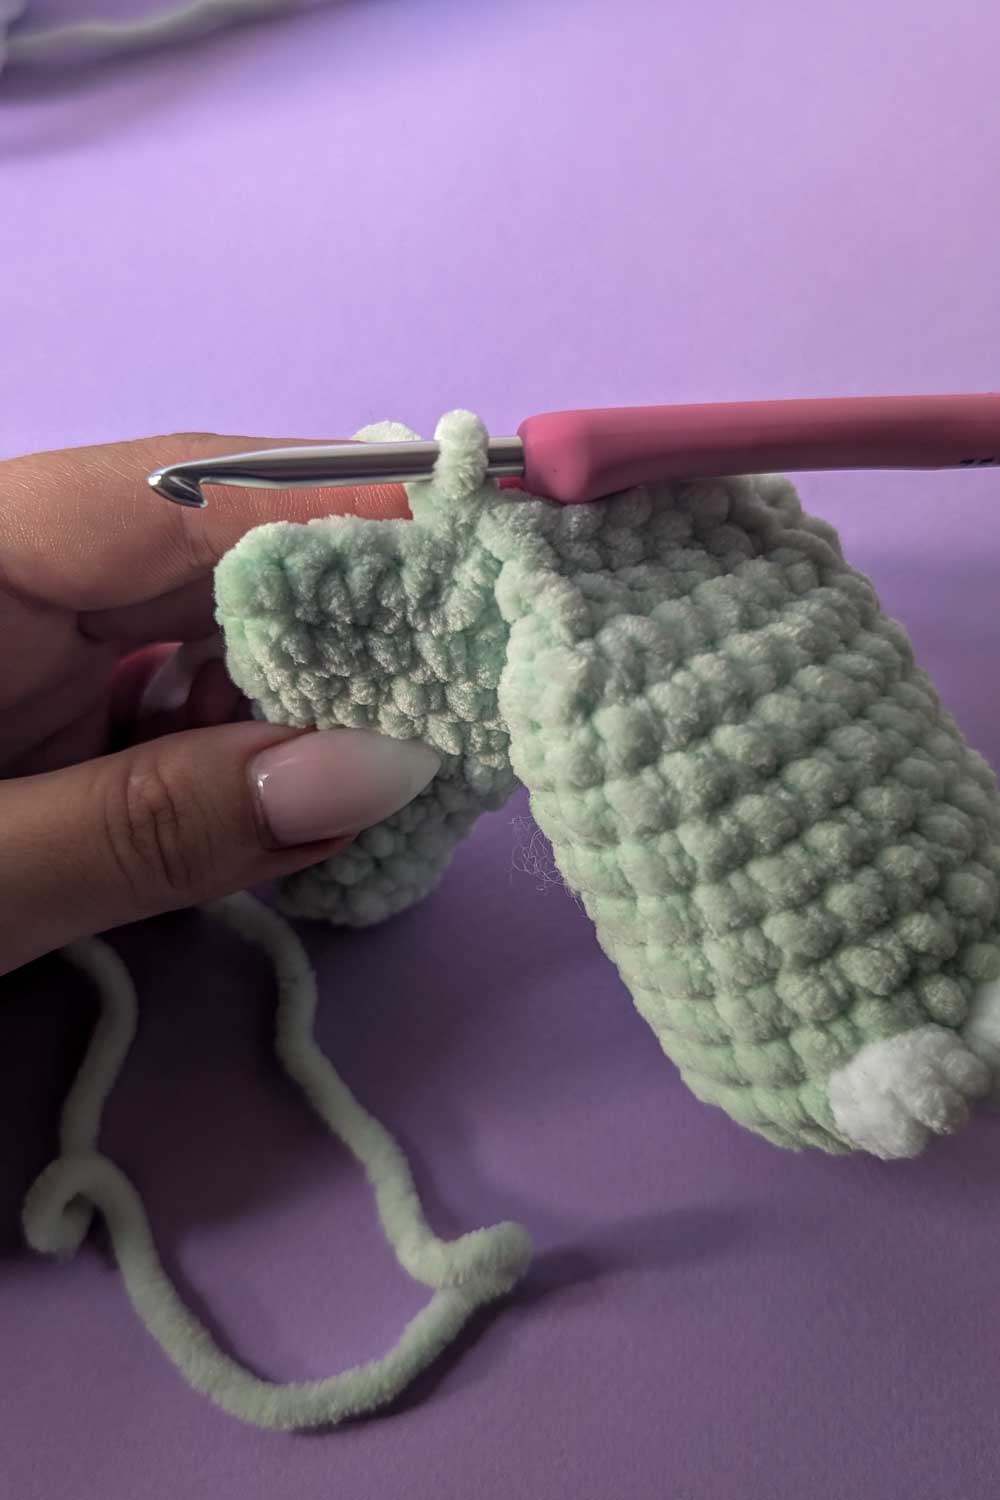
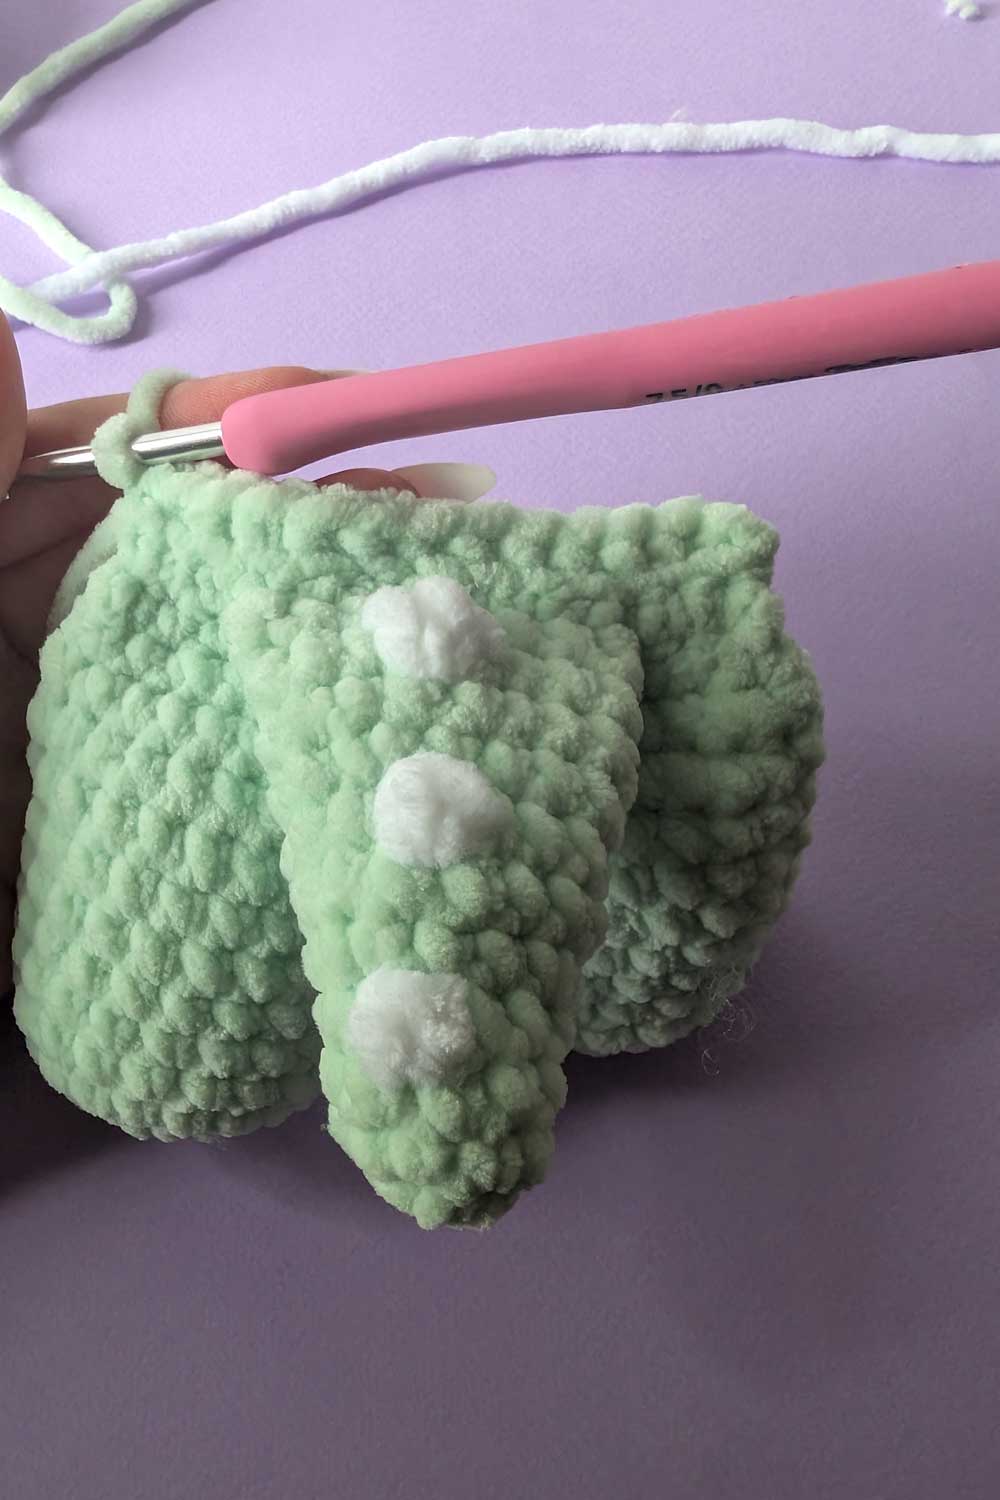
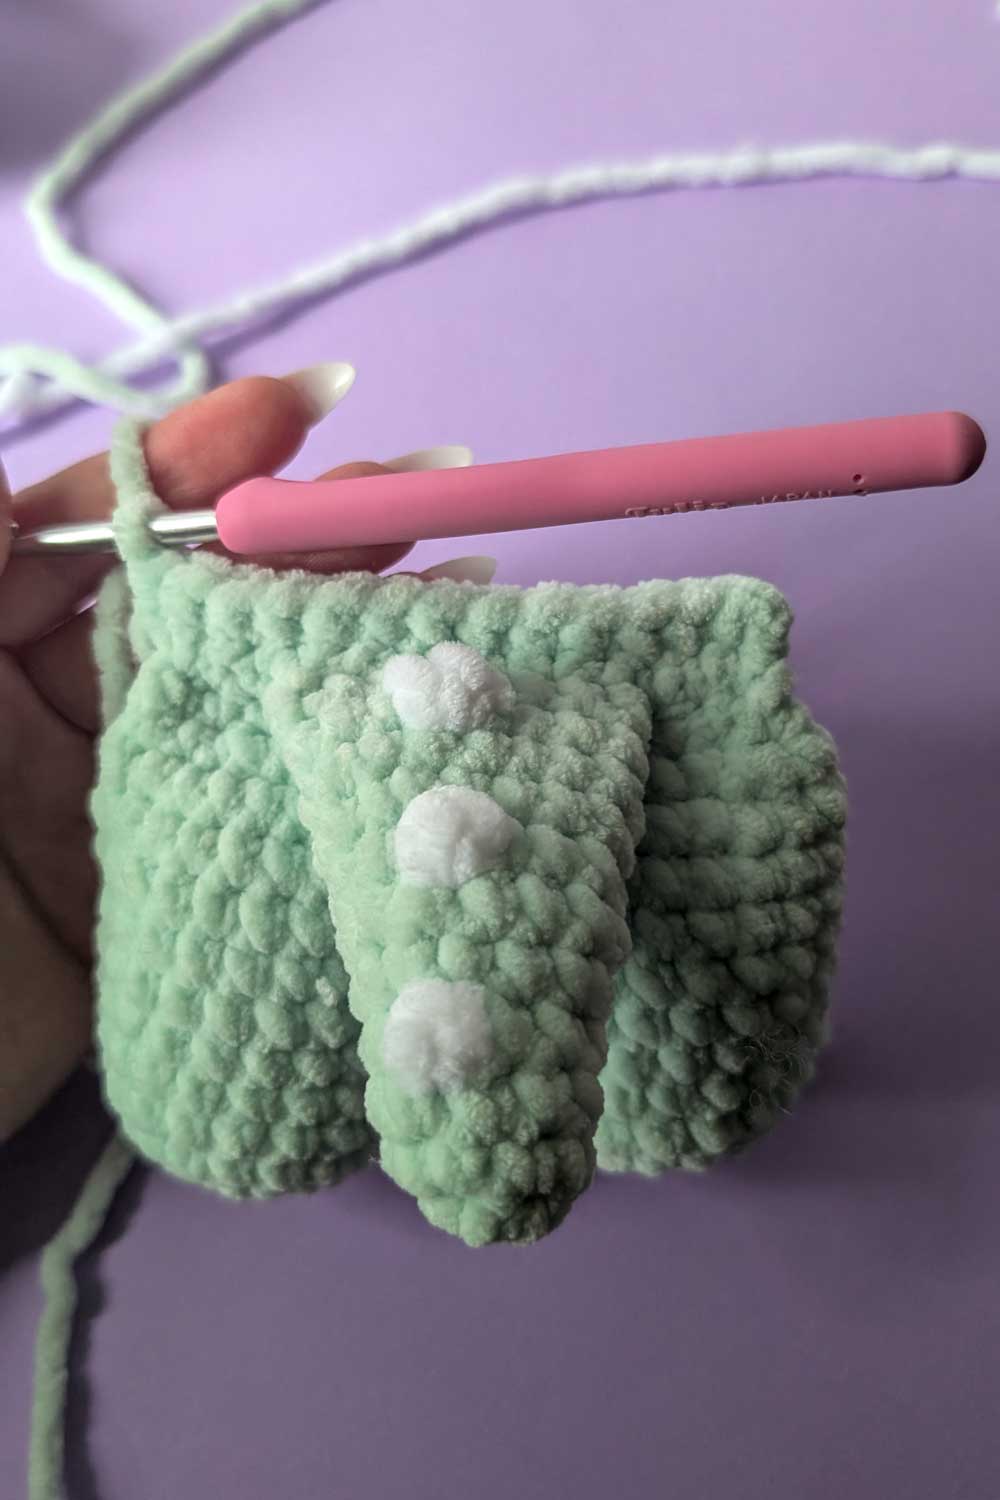
Back leg - make 2
Use Base color chenille yarn and 4.5mm crochet hook for all sc stitches.
Use accent color chenille yarn for bobbles.
Round 1: Round 1: 8 sc in mr (8 sts)
Round 2: inc x 8 (16 sts)
Round 3: inc x 5, 11 sc (21 sts)
Round 4: 2 sc, [4dcBO, sc] x 4, 11 sc (21 sts)
Round 5-11: 21 sc (21 sts)
Round 12: [sc, sc2tog] x 7 (14 sts)
Make alignment stitches if needed, stuff the leg and make 12 sc through both sides
Love This?
Choose your favorite image and save to your No Content board.
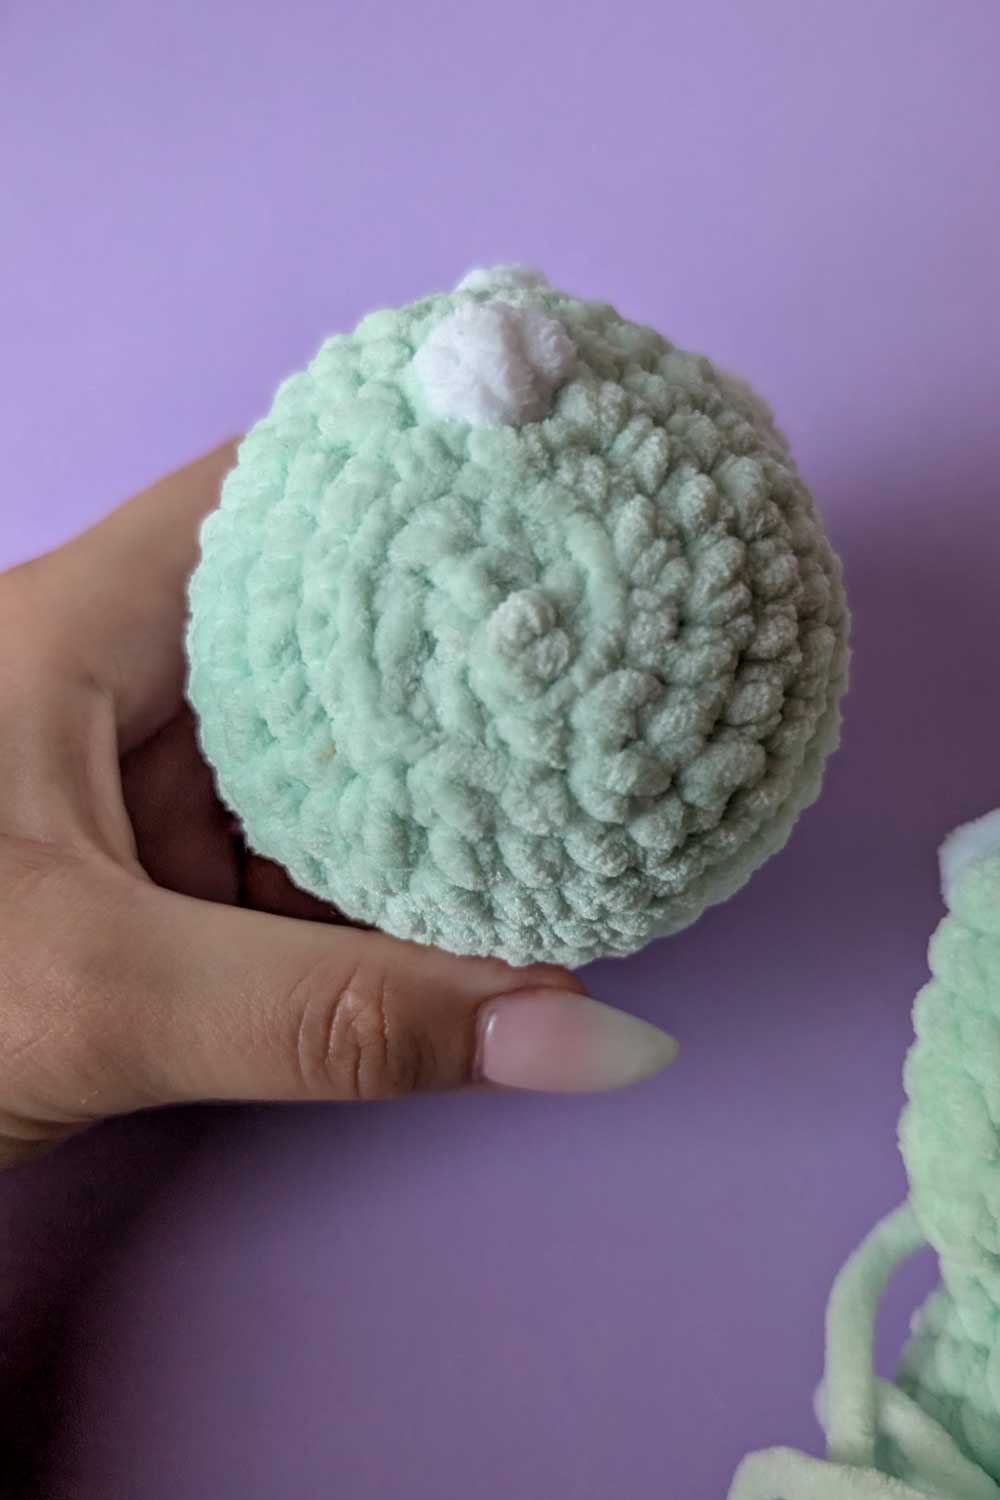
Head
Use Base color chenille yarn and 4.5mm crochet hook for all sc stitches.
Use accent color chenille yarn for bobbles
Note! The first two bobbles will be made in the base color, all the bobbles after will be made using accent color.
Round 1: 8 sc in mr (8 sts)
Round 2: inc x 8 (16 sts)
Round 3: [inc, sc] x 8 (24 sts)
Round 4: 10 sc, 2dcBO, 4 sc, 2dcBO, 8 sc (24 sts)
Round 5: 24 sc (24 sts)
Round 6: 6 sc, inc x 12, 6 sc (36 sts)
Round 7-8: 36 sc (36 sts)
Round 9: 13 sc, 4dcBO, 8 sc, 4dcBO, 13 sc (36 sts)
Round 10: 36 sc (36 sts)
Round 11: 18 sc, 2dcBO, 17 sc (36 sts)
Round 12: 36 sc (36 sts)
Round 13: [4 sc, sc2tog] x 6 (30 sts)
Round 14: sc [sc2tog, 3 sc] x 5, sc2tog, 2 sc (24 sts)
Round 15: [2 sc, sc2tog] x 3, sc, 3dcBO, sc2tog, [2 sc, sc2tog] x 2 (18 sts)
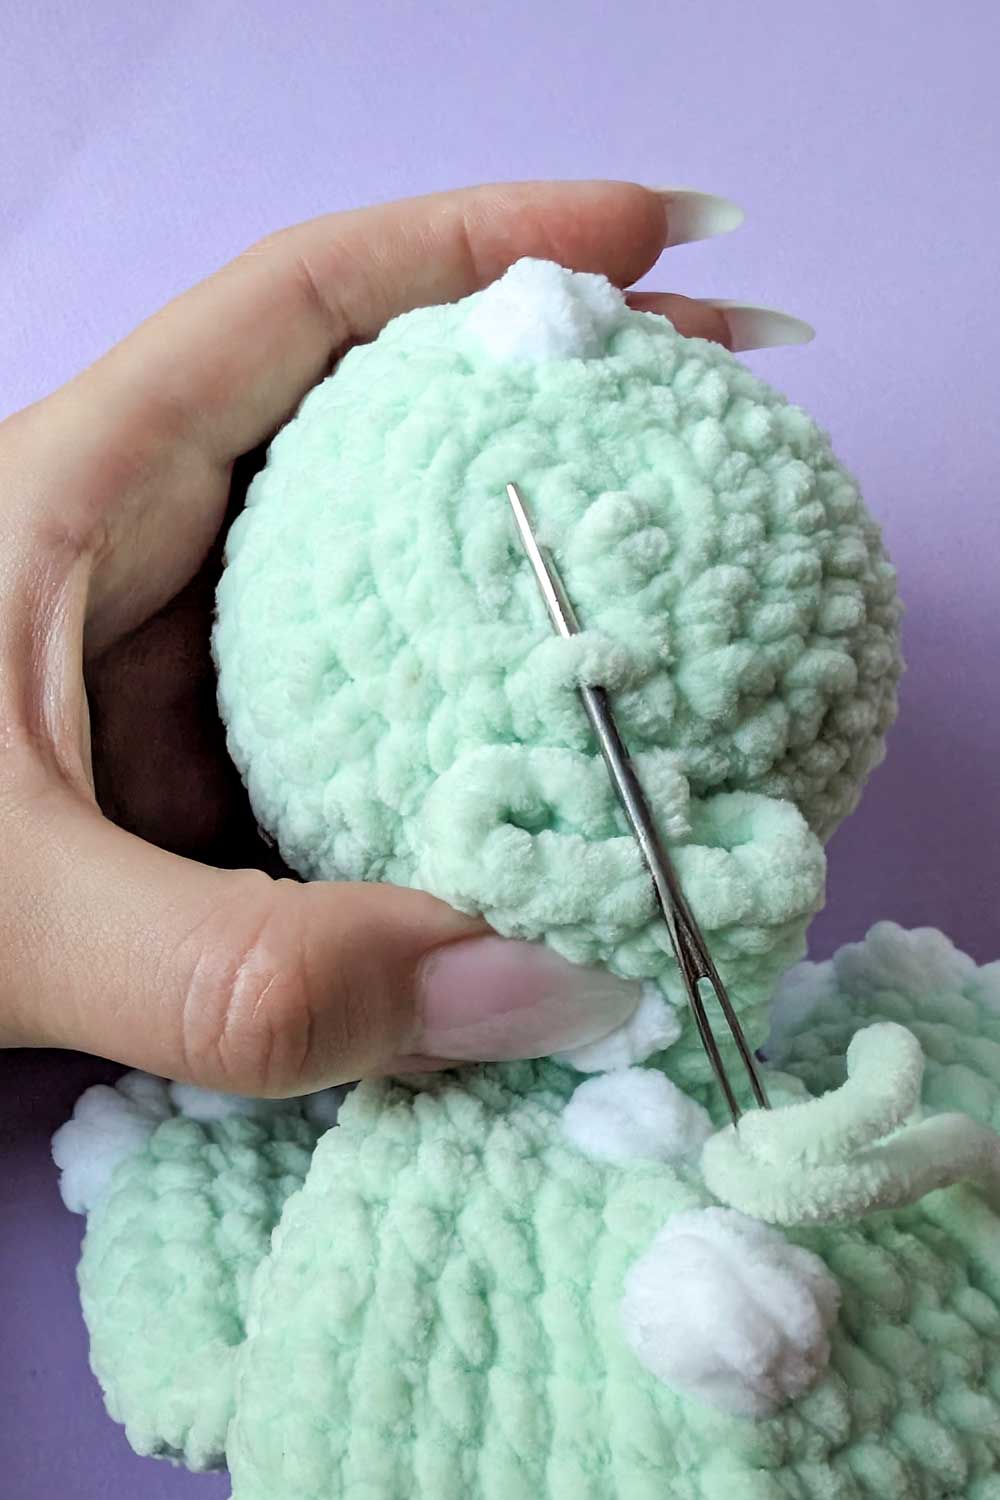
Fasten safety eyes between round 6 and 7 approx. 15-16 stitches apart.
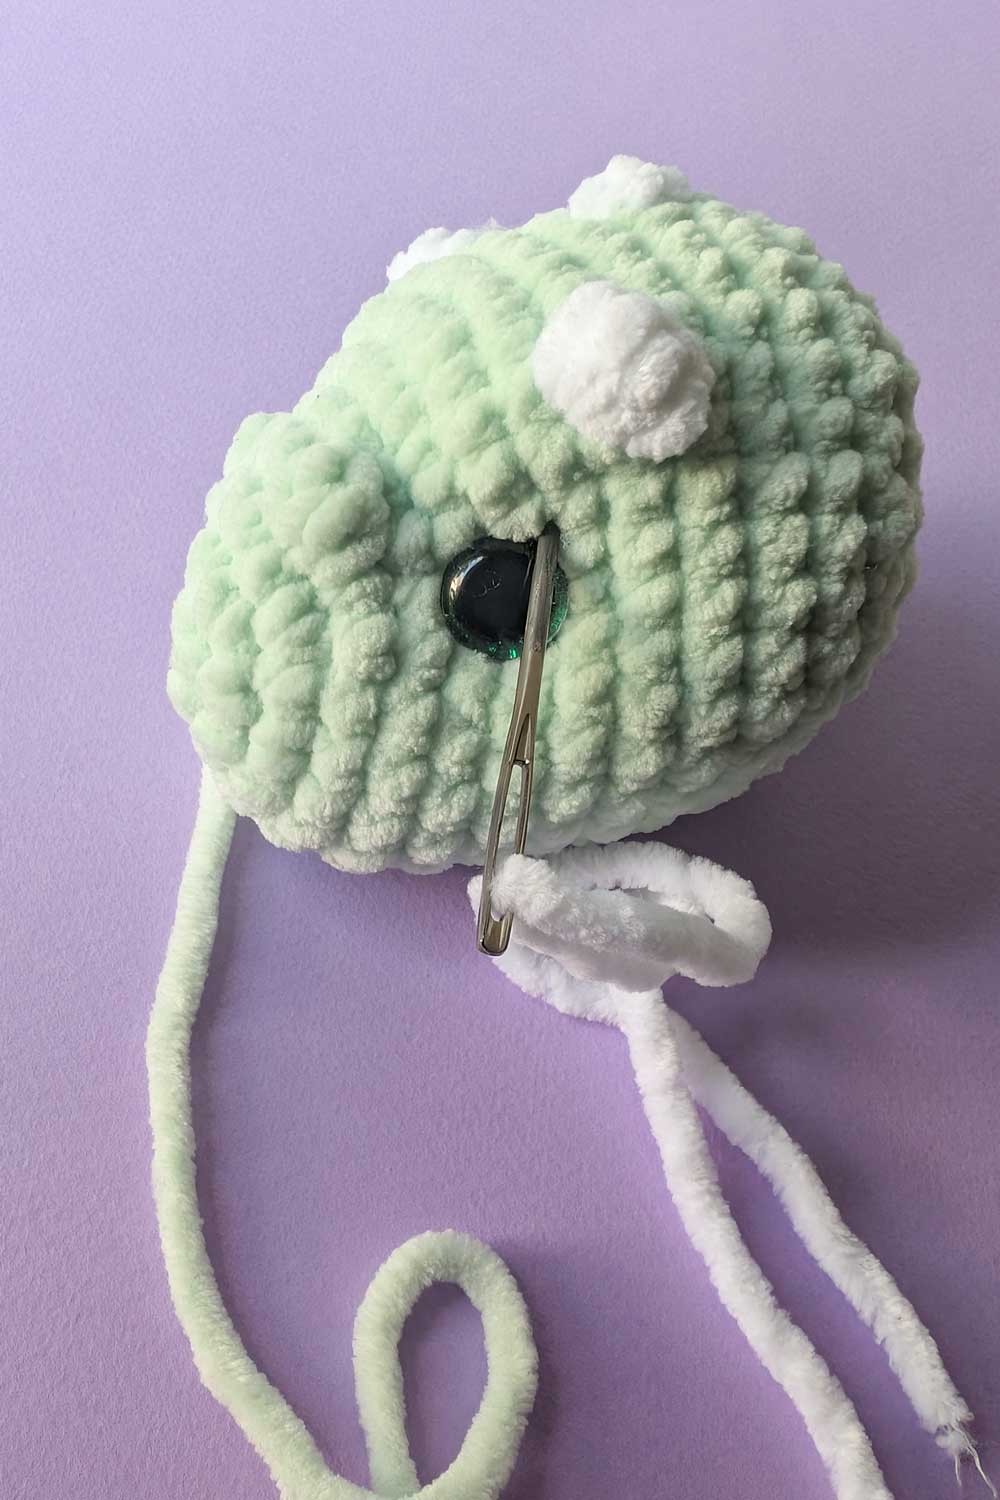

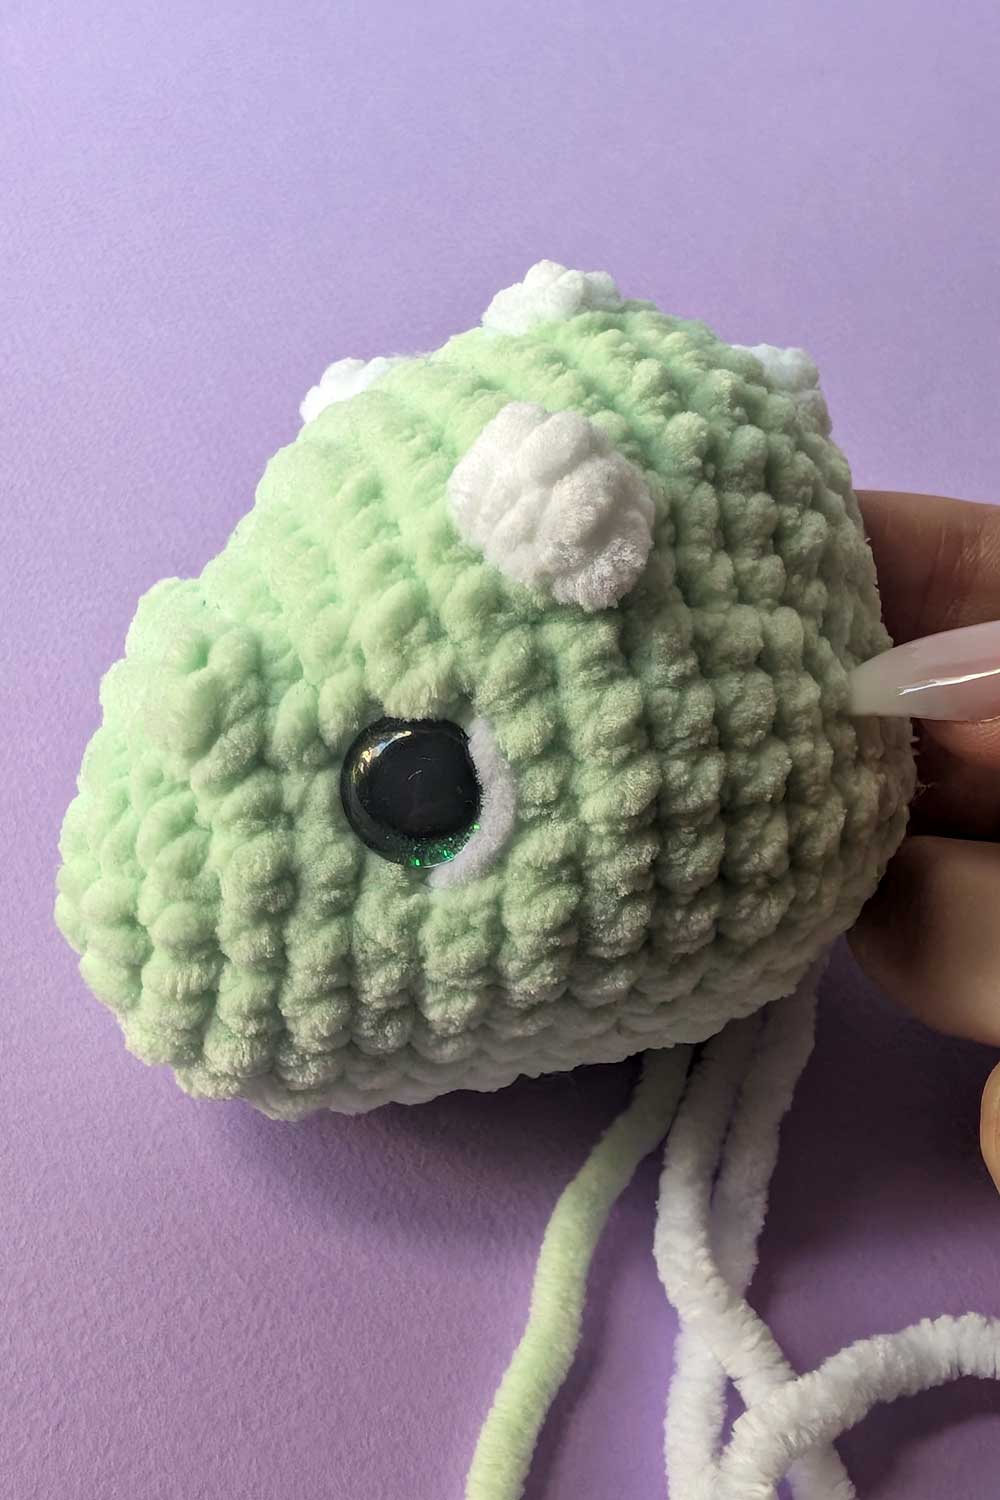
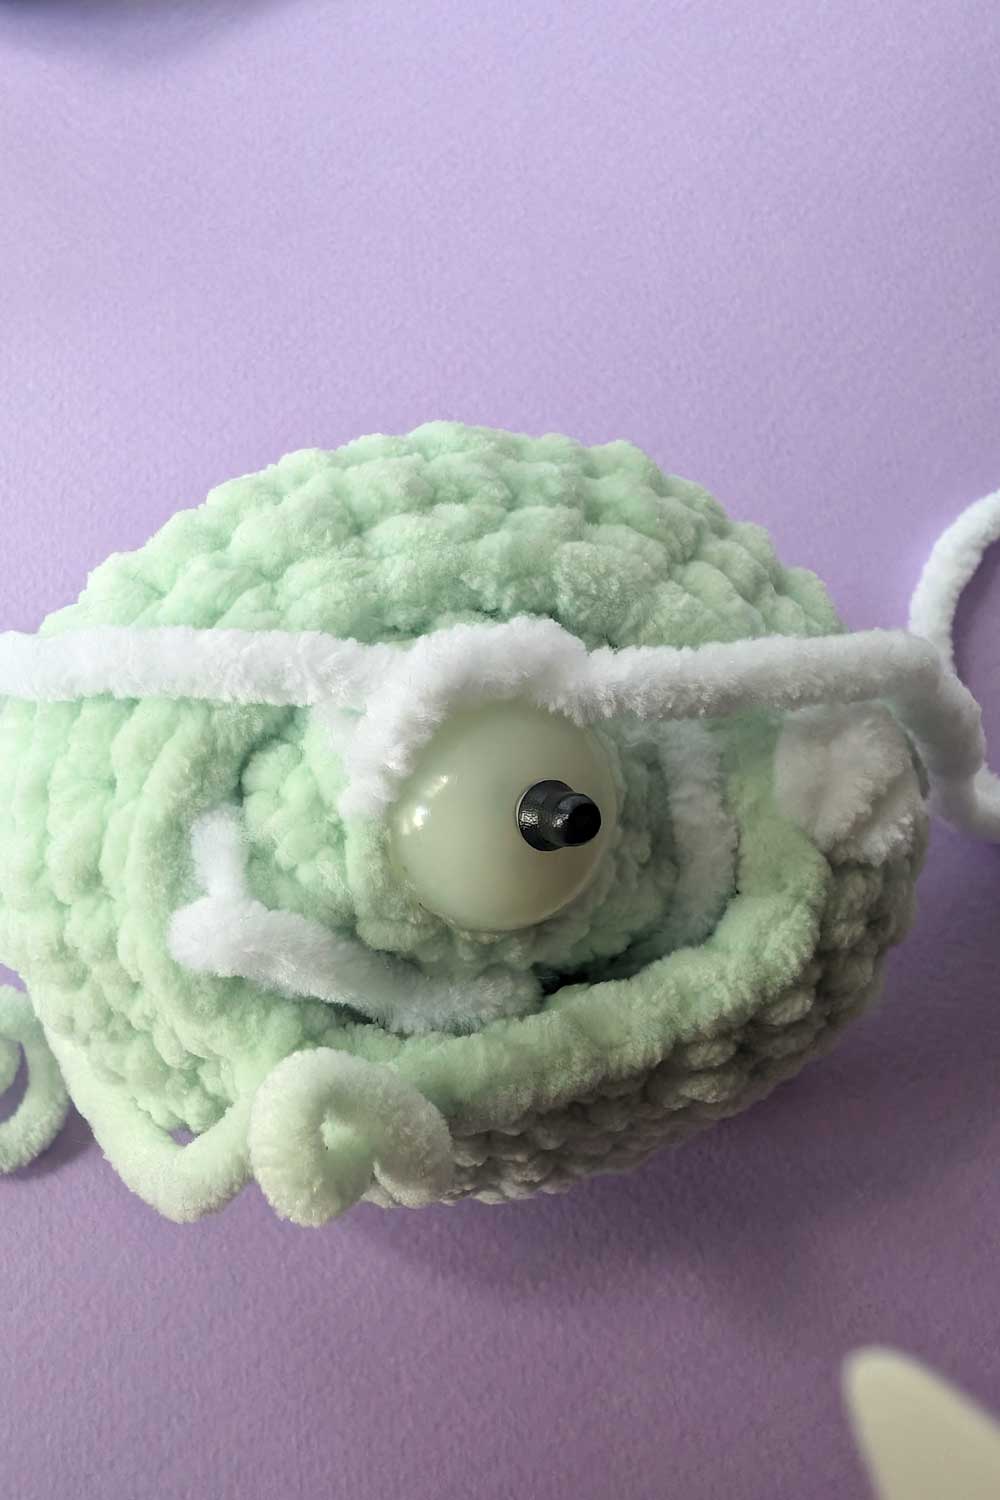
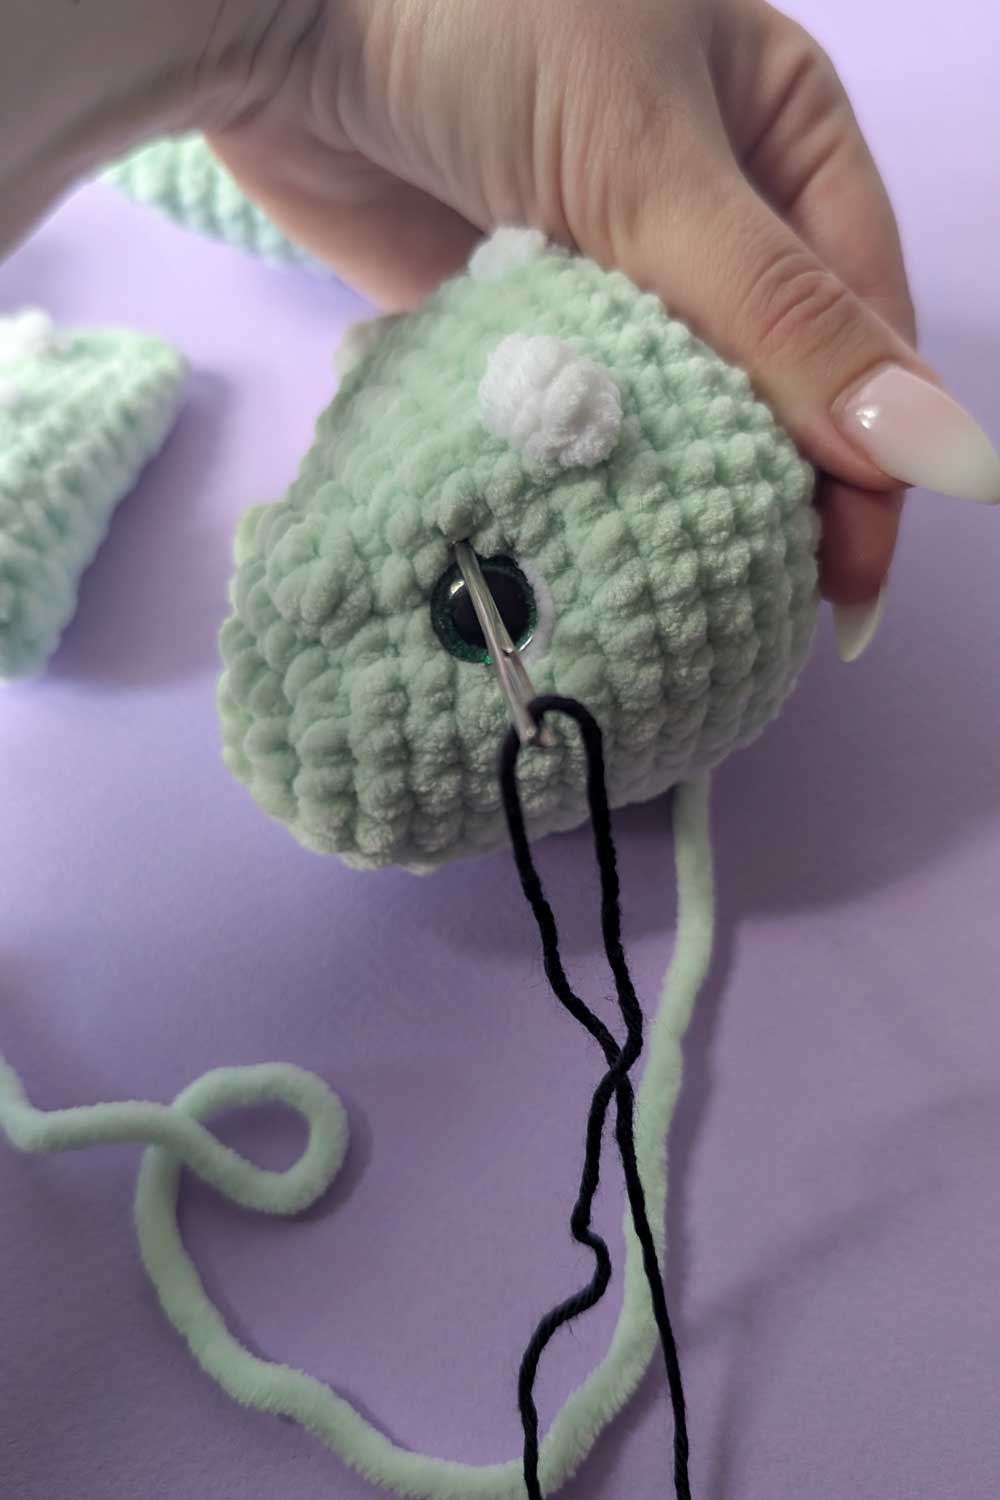
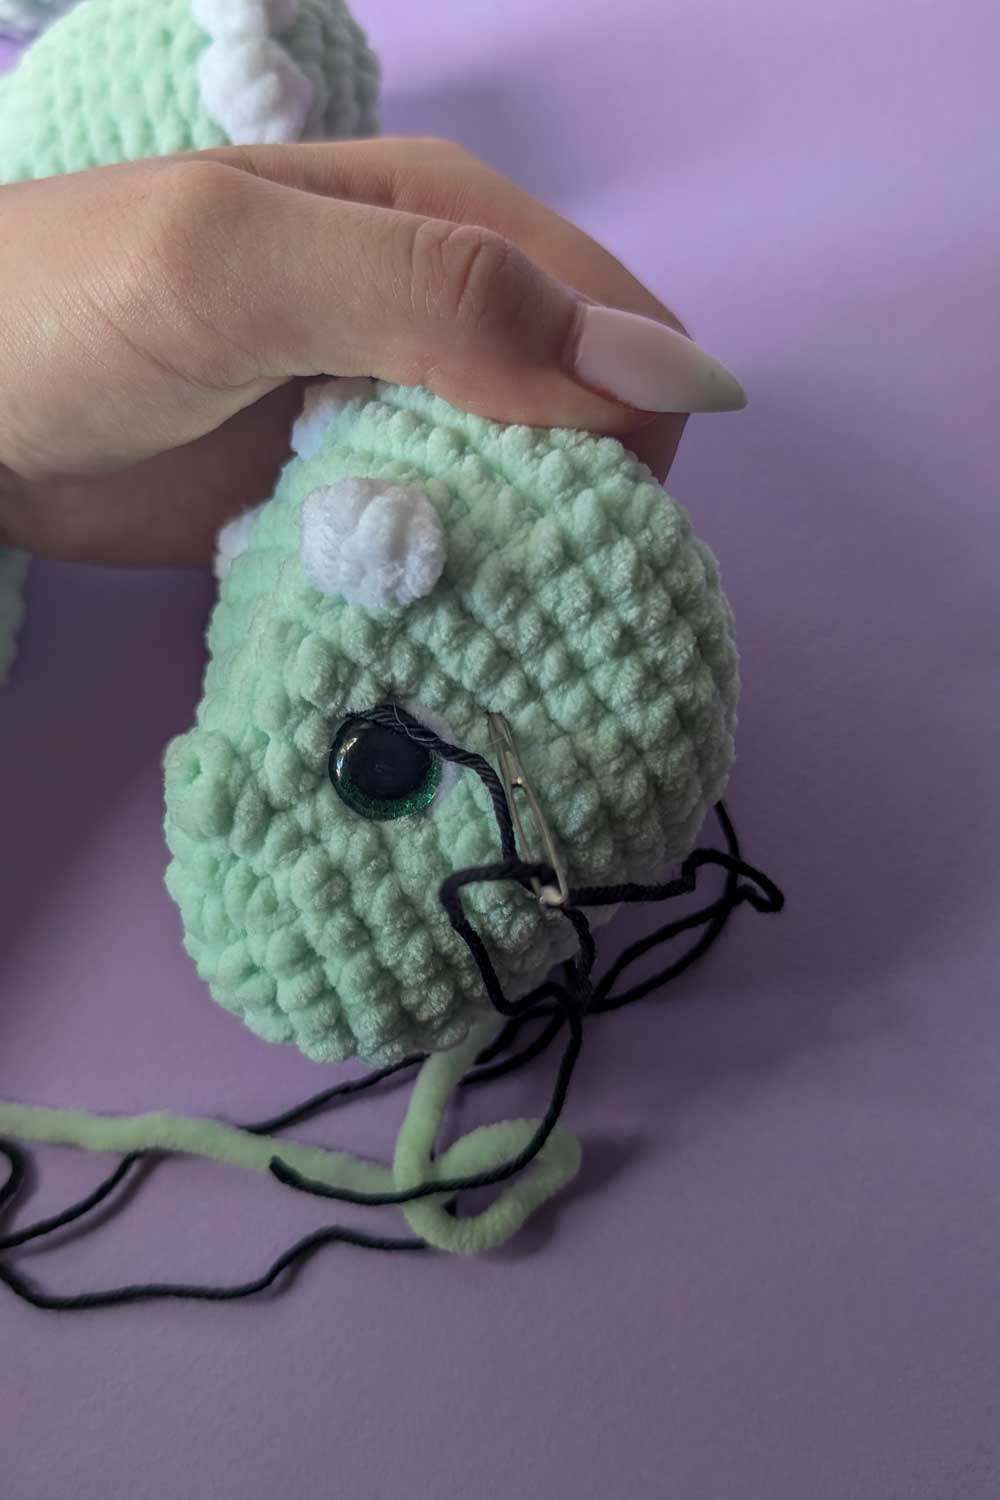
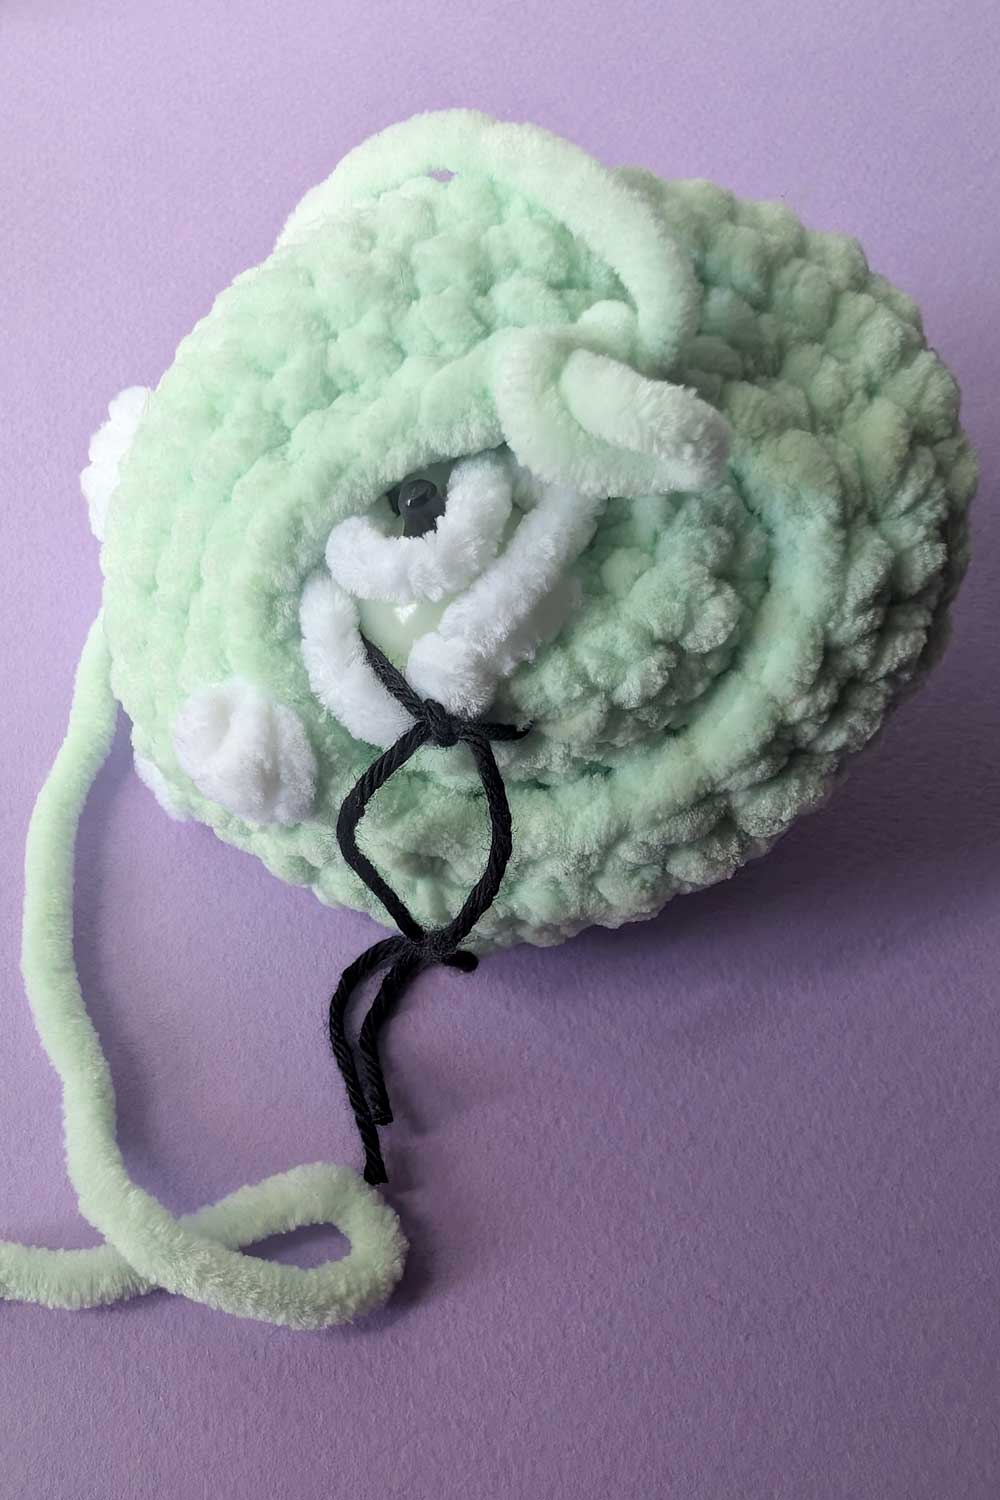
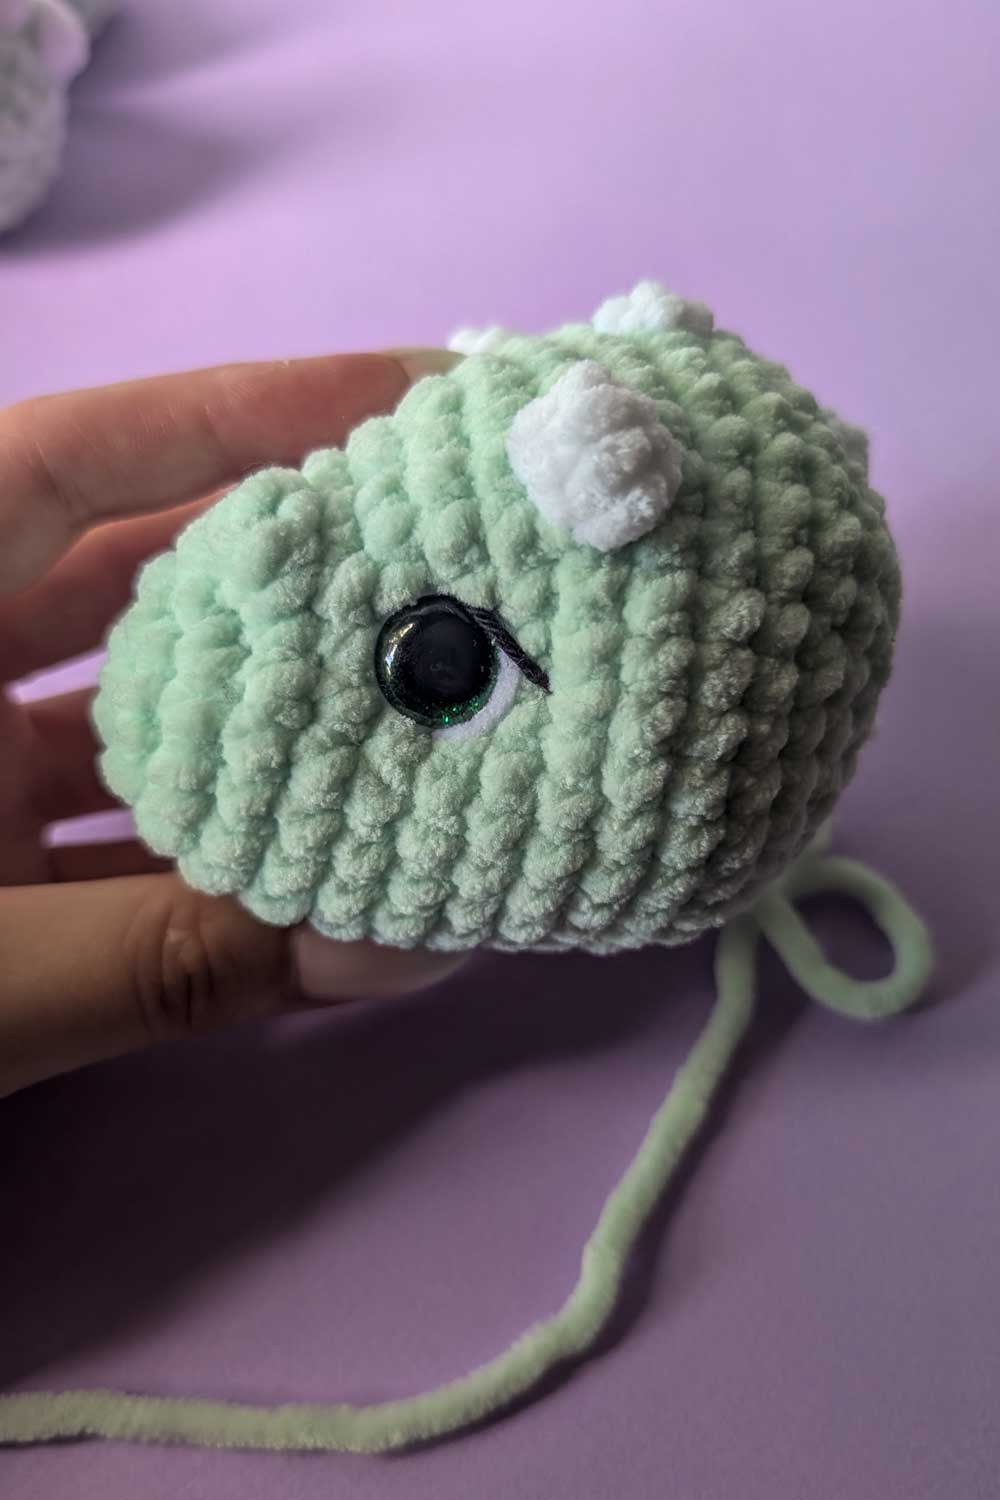
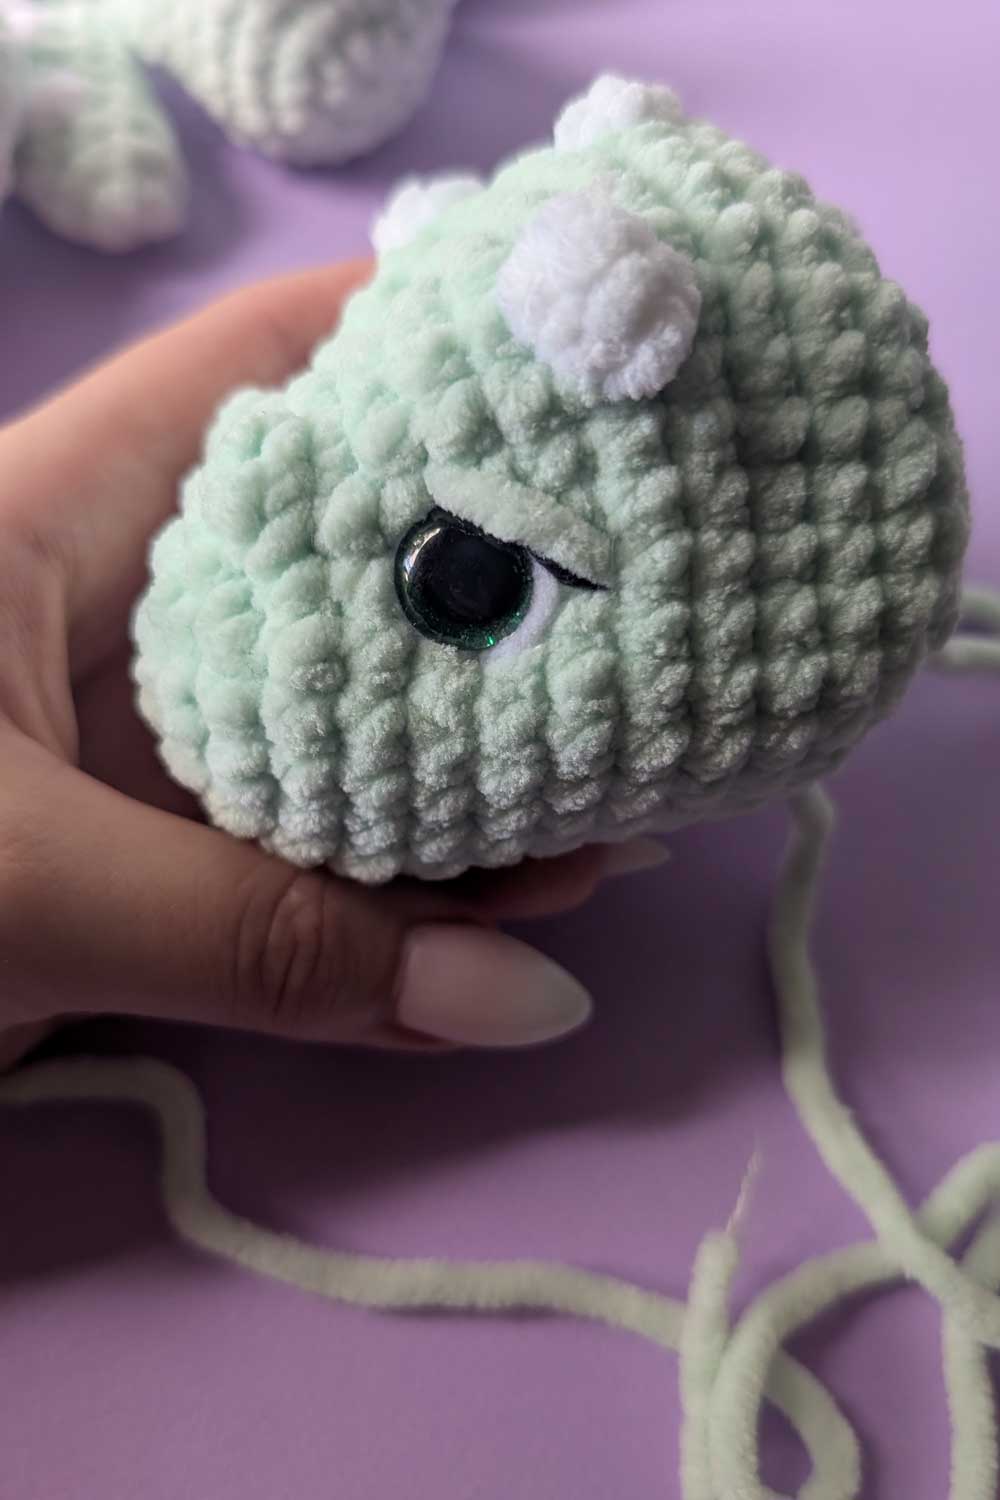
Take a piece of white chenille yarn and make the whites on the side of the eyes, take a piece of black cotton or acrylic yarn and make eyelashes. Do this before stuffing and closing the head so you may hide the ends inside the head. Stuff the head.
Round 16: [sc, sc2tog] x 6 (12 sts)
Round 17: In BLO sc2tog x 6 (6 sts) This will leave 12 front loops from round 16, these will be used to sew the head and body together.
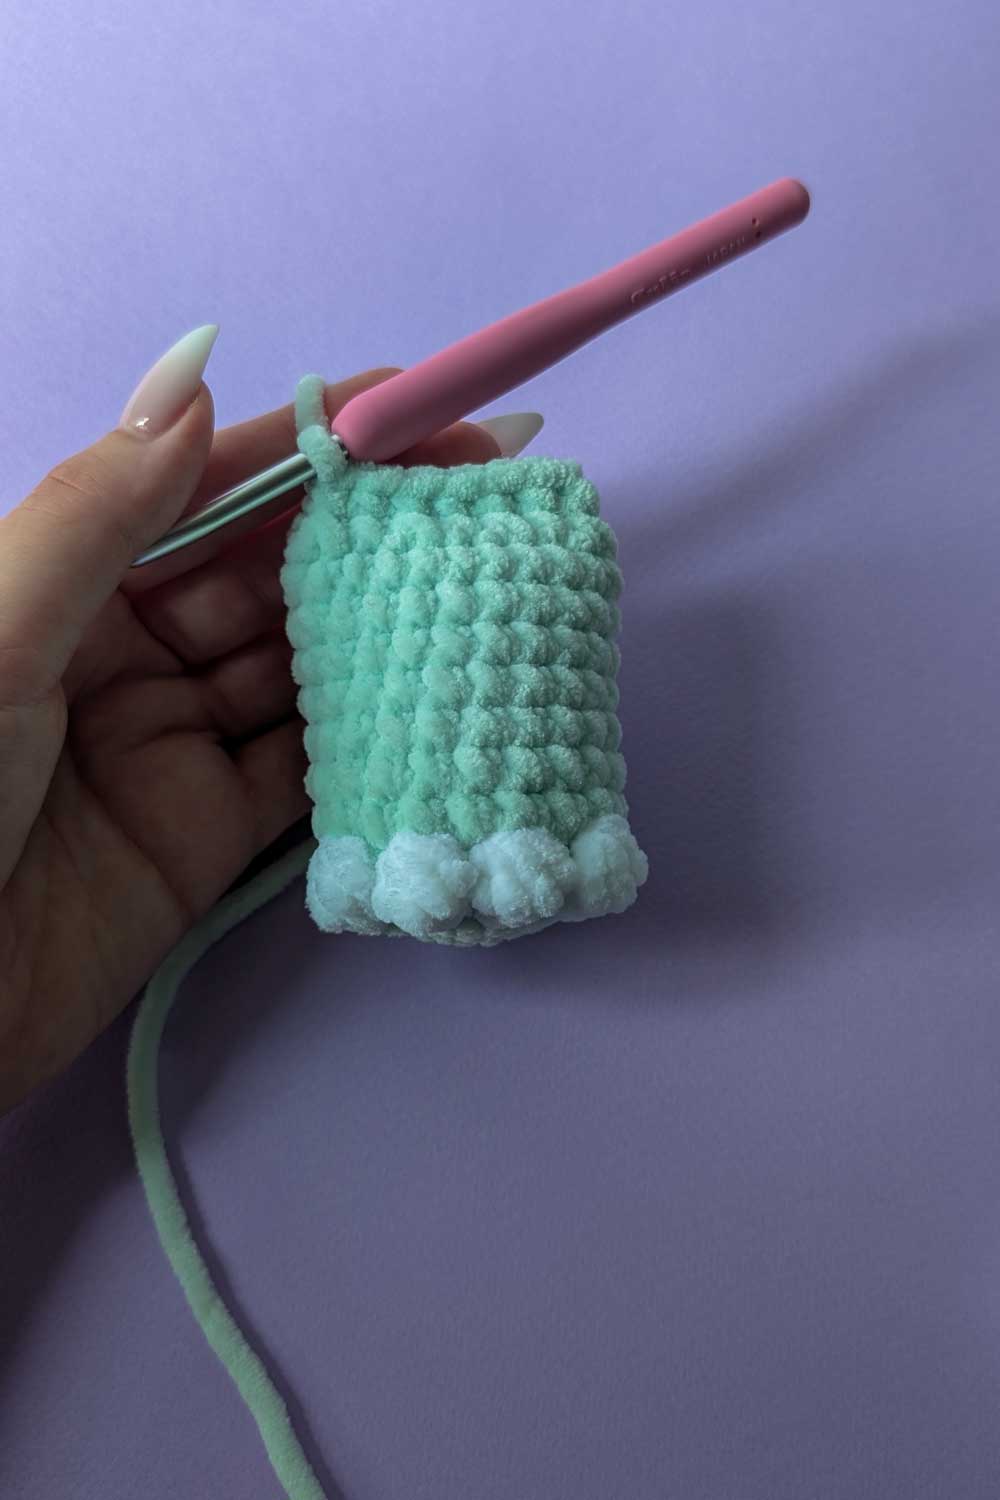
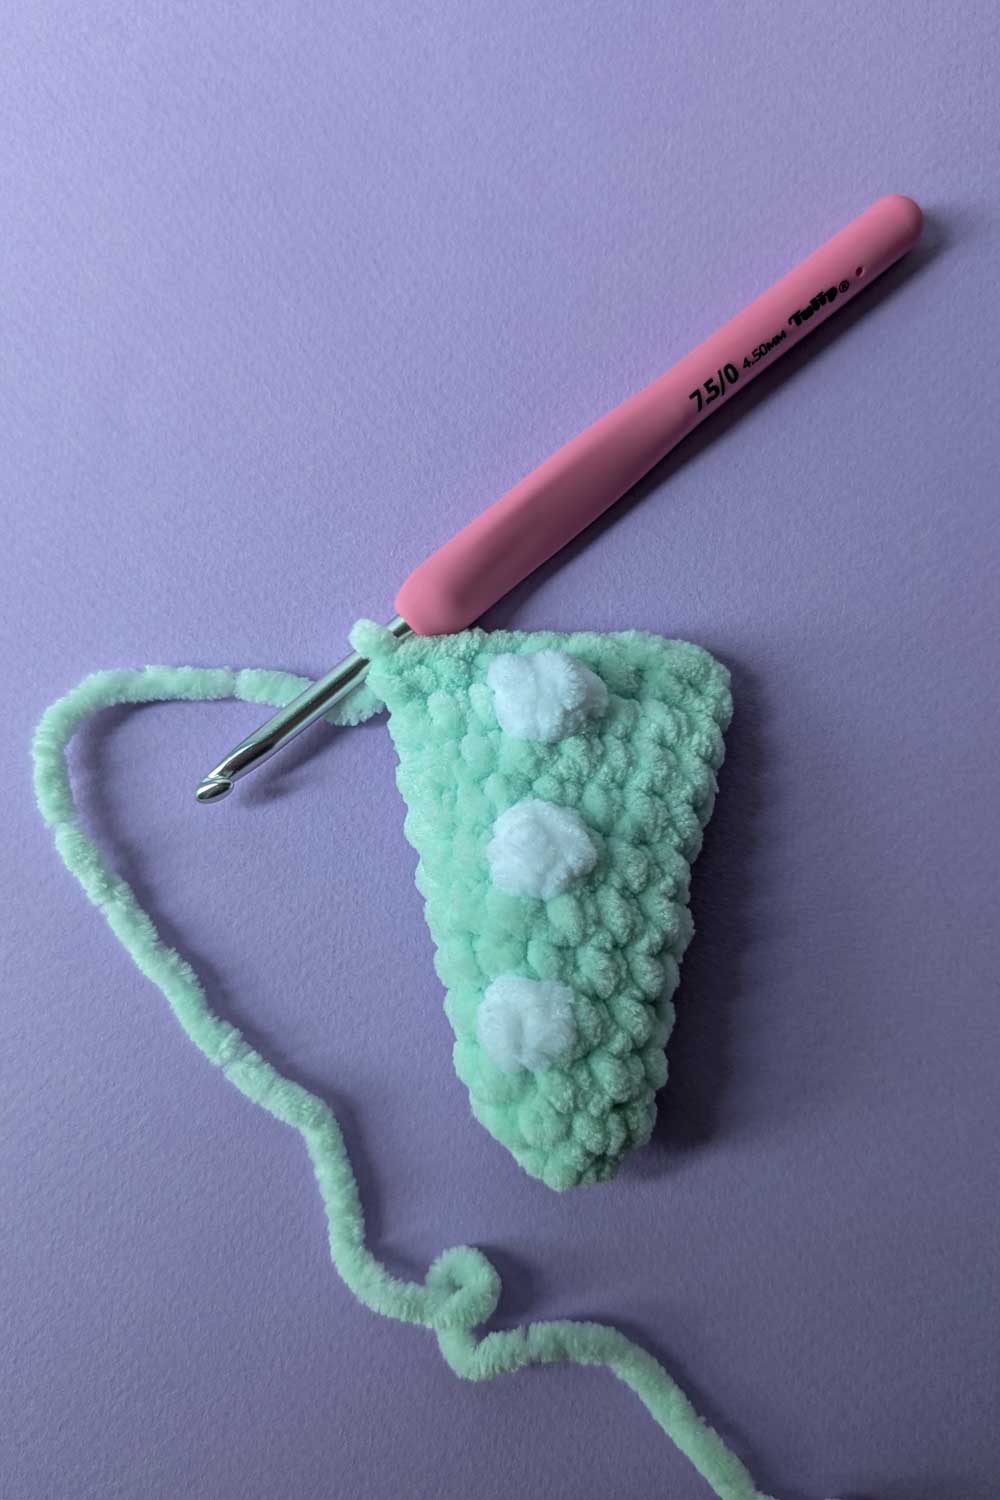
Tail
Use Base color chenille yarn and 4.5mm crochet hook for all sc stitches.
Use accent color chenille yarn for bobbles.
Round 1: 6 sc in mr (6 sts)
Round 2: [inc, sc] x 3 (9 sts)
Round 3: 9 sc (9 sts)
Round 4: 4 sc, 2dcBO, 4 sc (9 sts)
Round 5: [2 sc, inc] x 3 (12 sts)
Round 6: 12 sc (12 sts)
Round 7: 6 sc, 3dcBO, 5 sc (12 sts)
Round 8: [3 sc, inc] x 3 (15 sts)
Round 9: 15 sc (15 sts)
Round 10: 8 sc, 3dcBO, 6 sc (15 sts)
Round 11: 5 sc, fold both sides together, make 7 sc through both sides, cut your yarn and weave in your ends.
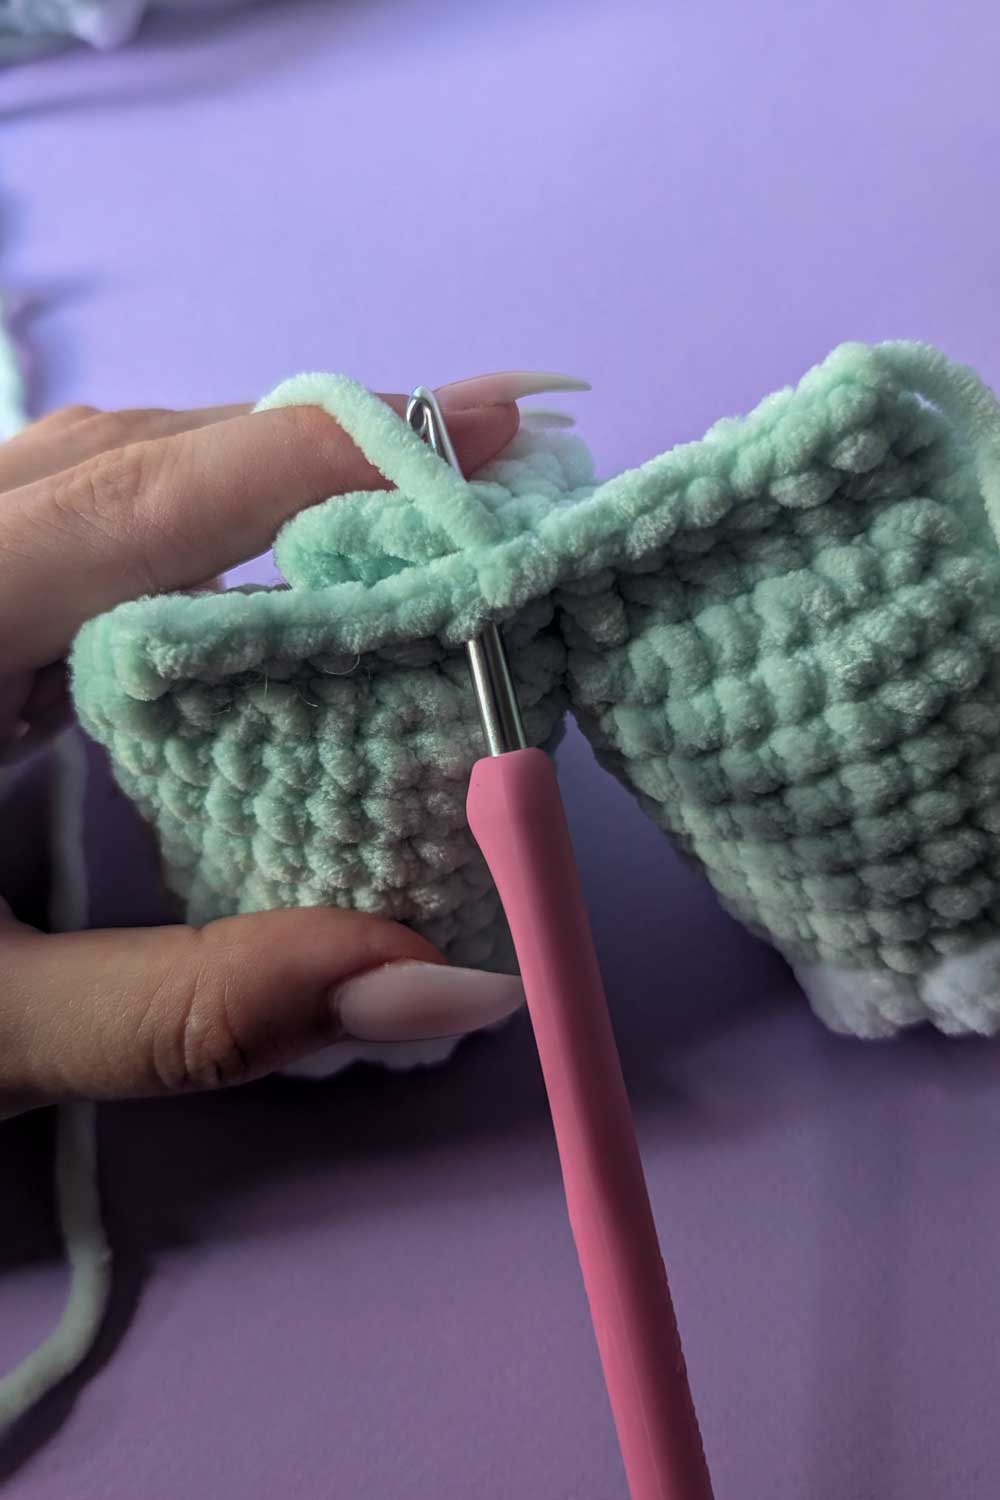
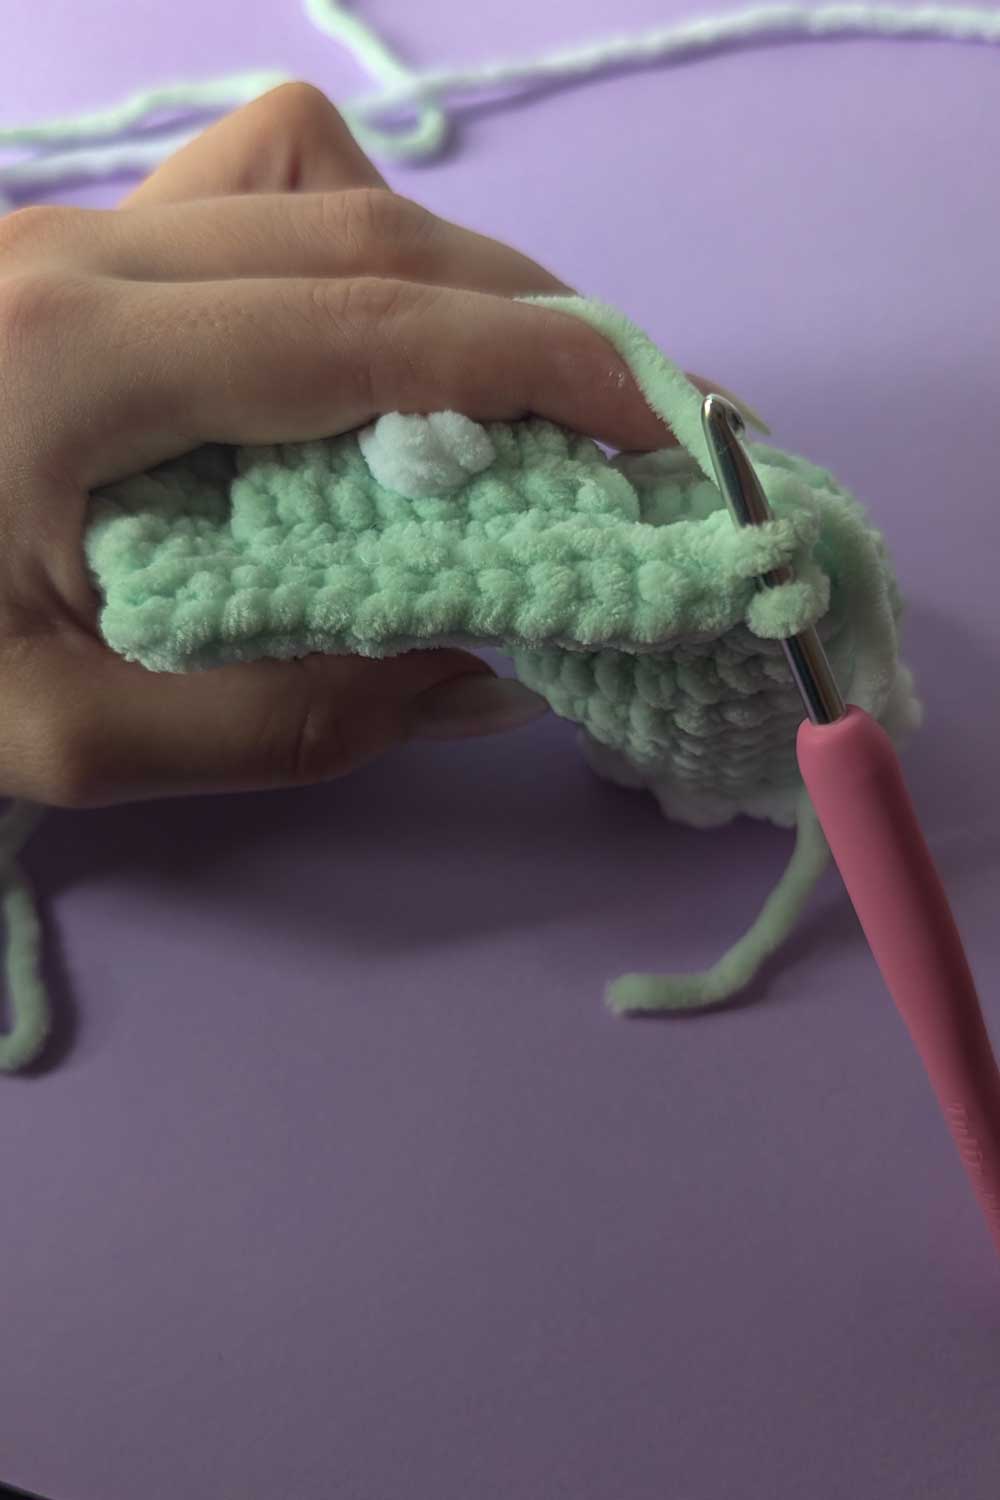
Body
Use Base color chenille yarn and 4.5mm crochet hook for all sc stitches.
Use accent color chenille yarn for bobbles.
Placing both back legs with the toes forward and the tail with the bobbles facing backwards.
Make a slip knot on your hook, starting from the left side on the left leg work as follows.
Round 1: 3 sc on the left leg, place tail behind the leg and work 3 sc through both the leg and the tail, make 1 sc on the tail, place right leg in front of tail, make 3 sc through both the leg and the tail, make 3 sc on the right leg. ch 1 and turn
We will now form the body by first working in the front loop of the stitches from round 1 and then in the back loop of the stitches from round 1, crocheting in the round.
Round 2: Working IN THE FRONT LOOP ONLY 13 sc, working on the other side of the same st, 13 sc (26 sts)
Round 3: inc, 11 sc, inc x 2, 11 sc, inc (30 sts)
Round 4: 7 sc , 4dcBO, 22 sc (30 sts)
Round 5-6: 30 sc (30 sts)
Round 7: 7 sc , 4dcBO, 22 sc (30 sts)
Round 8: 30 sc (30 sts)
Round 9: 16 sc, attach first front leg, 3 sc through both leg and body, 8 sc, attach second front leg, 3 sc through both leg and body (30 sts)
Round 10: 7 sc, 4dcBO, 22 sc (30 sts)
Round 11: [sc, sc2tog] x 10 (20 sts)
Round 12: 20 sc (20 sts)
Round 13: sc2tog x 2, sc, 4dcBO, sc2tog x 4, 2 sc, sc2tog x 2 (12 sts)
Round 14-16: 12 sc (12 sts)
Round 17: 4 sc, 3dcBO, 7 sc (12 sts)
Round 18: 12 sc (12 sts)
Cut your yarn, making sure to leave a yarn tail for sewing the body to the head.
Sew the opening of the neck together with the corresponding stitches of the front loops left on the head. Cut, tie, weave in and fasten your ends
Love This?
Choose your favorite image and save to your No Content board.


I love this pattern so much! I will be making one for my baby boy Also, If you embroider the eyes, it will be a lot more baby friendly! Those eyes are choking hazards!