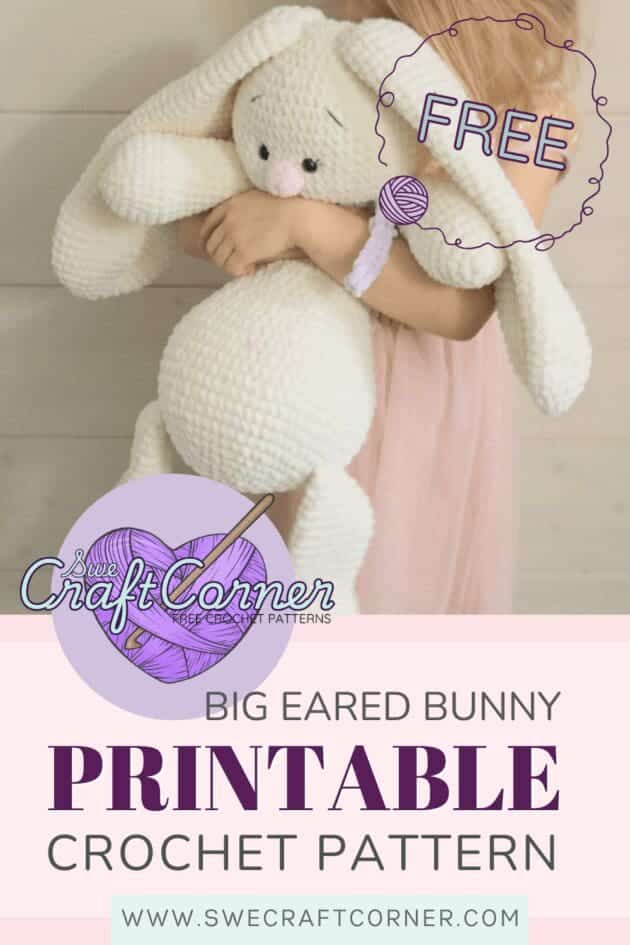
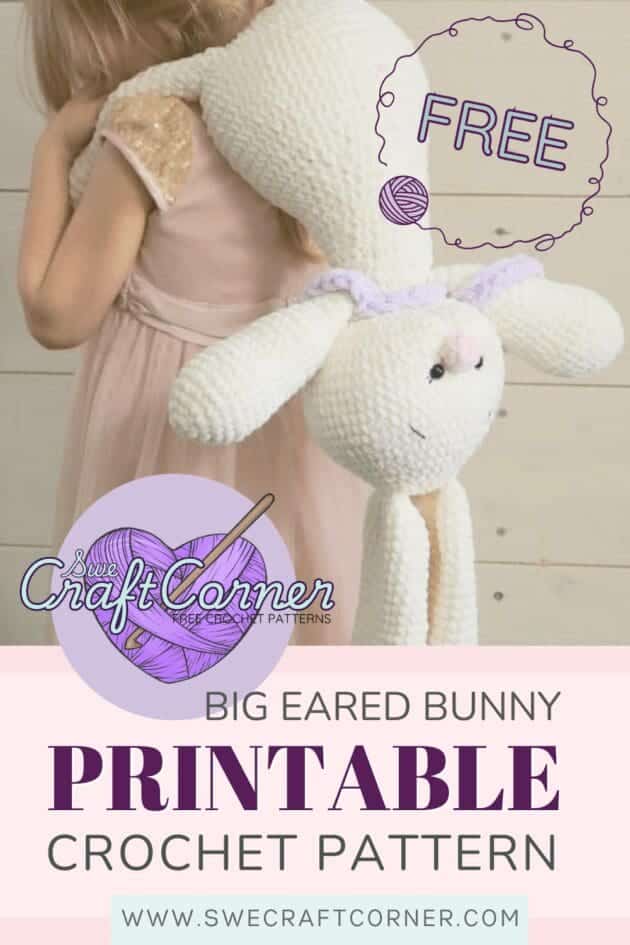
How to make - Big crochet Bunny free pattern
Perfect for amigurumi and plushie lovers! this crochet stuffed animal makes a wonderful gift for any occasion. With easy-to-follow instructions and a bit of yarn, you’ll be able to craft this sweet bunny with floppy ears in no time.
The bunny is HUGE measuring over 55 cm ( 98 cm with ears).
This big eared bunny with floppy ears is Super cozy when made with a fluffy chenille yarn
Perfect gift for baby shower, baptism, birthday or just a beautiful gift / present
The huge ears are the perfect place to embroider memorabilia or something sweet for the child, perhaps from a parent serving in the army, or a grandmother living far away, this bunny can hug your child when you cant and will be a friend for life!
If you love the pattern please share the link with your friends, I would be so happy if you did!
Made with chenille yarn for maximum cosyness
The yarn i used for this pattern is Sirdar smudge. Below I have listed some alternatives to Sirdar smudge
Paintbox Yarns - Chenille
Katia – bambi
Universal yarn – bella chenille
Cygnet – chenille chunky
Premier yarns – retro velvet
Bernat – velvet
Red heart – sweet home
Bernat – baby blanket
Yarn: 450 gr of Paintbox Yarns - Chenille in white and 50 gr of pink
Hook: 3,5mm and 6mm
Tapestry needle
Safety eyes 12mm
Scissors
Fiber fill
You can check out my collected pattern info below if you need more guidance when working with one of my patterns.
If you need any help or clarification on the terms I use you can see them below. All of my original designs are written using US crochet terms
Materials:
Hook: 3,5 mm
Yarn: bulky yarn, requiring approx. 6,5 mm hook
Or yarn and hook creating gauge: 5 rows of 5 single crochets = 5x5 cm
White yarn: approx. 450 gr
Pink yarn: approx. 50 gr
Yarn for scarf: bulky and crochet hook 6 - 6,5mm
Tapestry needle
Safety eyes 12mm
Wadding
Crochet terms used:
Sc = single crochet
Sc2tog = make 2 single crochets into one
Sl st = slip stitch
St = stitch
Sts = stitches
Pattern info:
This pattern is worked in the round, use stitch marker and mark the beginning of each round.
When a series of stitches are repeated these are within * - * and the total of times that sequence is croched is written behind. The sts are separated with a comma, so: 1 sc,2 sc, means that you make 1 sc in the first st and 2 sc in the next st.
If you got any questions, please contact me via Etsy or on my email swecraftcorner@gmail.com
Head:
R 1: Make a magic ring, in the magic ring make 10 sc
R 2: 2 sc in each stitch around = 20 sts
R 3: *1 sc in 2 sts, 2 sc in next st* 6 times, 1 sc in last 2 sts = 26 sts
R 4: 1 sc in first stitch, 2 sc in next st, *1 sc in 3 sts, 2 sc in next st* 6 times = 33 sts
R 5: *1 sc in 4 sts, 2 sc in next st* 6 times, 1 sc in last 3 sts = 39 sts
R 6: 1 sc in 2 sts, 2 sc in next st, *1 sc in 5 sts, 2 sc in next st* 6 times = 46 sts
R 7: *1 sc in next 6 sts, 2sc in next st* 6 times, 1 sc in last 4 sts = 52 sts
R 8: 1 sc in next 3 sts, 2 sc in next st, *1 sc in 7 sts, 2 sc in next st* 6 times = 59 sts
R 9: *1 sc in 10 sts, 2 sc in next st* 5 times, 1 sc in last 4 sts = 64 sts
R 10-18: 1 sc in each st = 64 sts
R 19: *1 sc in 6 sts, sc2tog* 8 times = 56 sts
R 20: *1 sc in 4 sts, sc2tog* 9 times, 1 sc in last 2 sts = 47 sts
R 21: *1 sc in 2 sts, sc2tog* 11 times, 1 sc in next st, sc2tog = 35 sts
Stuff the head
R 22- : sc2tog until head is closed, fasten off
Ears: (make 2)
R 1: Make a magic ring, 8 sc
R 2: 2 sc in each st = 16 sts
R 3: *1 sc, 2 sc in next st* 8 times = 24 sts
R 4: *1 sc in 2 sts, 2 sc in next st* 8 times =
32 sts
R5: *1 sc in 3 sts, 2 sc in next st* 8 times =
40 sts
R 6-12: 1 sc in each st = 40 sts
R 13: *1 sc in 3 sts, sc2tog* 8 times = 32 sts
R 14-41: 1 sc in each st = 32 sts
R 42: *sc2tog, 1 sc in next st* 11 times = 22 sts
R 43: sc2tog 11 times = 11 sts Nose:
R 1: Make a magic ring, 5 sc
R 2: 1 sc in each st
Fasten off
Assemble the head:
Sew the eyes between Round 13 and 14.
Would you like to save this?
Start from the bottom of the head, pull needle and yarn through the middle of where you want your nose to be placed, around and back through the bottom of the head, repeat a few times for the bunny look, fasten thread and sew the nose in place.
The ears will be placed approx. sewed between round 3-4
Body:
R 1: Make a magic ring, in the magic ring make 10 sc = 10 sts
R 2: 2 sc in each stitch around = 20 sts
R 3: *1 sc in 2 sts, 2 sc in next st* 6 times, 1 sc in last 2 sts = 26 sts
R 4: 1 sc in first stitch, 2 sc in next st, *1 sc in 3 sts, 2 sc in next st* 6 times = 33 sts
R 5: *1 sc in 4 sts, 2 sc in next st* 6 times, 1 sc in last 3 sts = 39 sts
R 6: 1 sc in 2 sts, 2 sc in next st, *1 sc in 5 sts, 2 sc in next st* 6 times = 46 sts
R 7: *1 sc in next 6 sts, 2sc in next st* 6 times, 1 sc in last 4 sts = 52 sts
R 8: 1 sc in next 3 sts, 2 sc in next st, *1 sc in 7 sts, 2 sc in next st* 6 times = 59 sts
R 9: *1 sc in 10 sts, 2 sc in next st* 5 times, 1 sc in last 4 sts = 64 sts
R 10: 1 sc in 6 sts, 2 sc in next st, *1 sc in 12 sts, 2 sc in next st* 4 times, 1 sc in last 5 sts = 69 sts
R 11-15: 1 sc in each st = 69 sts
R 16: *1 sc in 12 sts, sc2tog* 4 times, 1 sc in 6 sts, Sc2tog, 1 sc in last 5 sts = 64 sts
R 17: sc2tog, *1 sc in 10 sts, sc2tog* 5 times, 1 sc in last 2 sts = 58 sts
R 18: 1 sc in 7 sts, sc2tog, *1 sc in 9 sts, sc2tog* 4 times, 1 sc in last 5 sts = 53 sts
R 19: 1 sc in 3 sts, sc2tog, *1 sc in 8 sts, sc2tog* 4 times, 1 sc in remaining 8 sts = 48 sts
R 20: sc2tog, *1 sc in 6 sts, sc2tog* 5 times, 1 sc in last 6 sts = 42 sts
R 21: sc2tog, *1 sc in 4 sts, sc2tog* 6 times, 1 sc in last 4 sts = 35 sts
R 22-25: 1 sc in each st = 35 sts
R 26: * 1 sc in 3 sts, sc2tog* 7 times = 28 sts
R 27-29: 1 sc in each st = 28 sts
R 30: *1 sc in 2 sts, sc2tog* 7 times = 21 sts
R 31: 1 sc in each stitch = 21 sts
R 32: *1 sc, sc2tog* 7 times = 14 sts
R 33: 1 sc in each = 14 sts
Sl st into first st and fasten yarn
Arms: (make 2)
R 1: Make a magic ring and 6 sc
R 2: 2 sc in each st = 12 sts
R 3: *1 sc, 2 sc in next st* 6 times = 18 sts
R 4: *1 sc in 2 sts, 2 sc in next st* 6 times =
24 sts
R 5: *1 sc in 3 sts, 2 sc in next st* 6 times =
30 sts
R 6-9: 1 sc in each st = 30 sts
R 10: *1 sc in 3 sts, sc2tog* 6 times = 24 sts
R 11-16: 1 sc in each st = 24 sts
R 17: *1 sc in 2 sts, sc2tog* 6 times = 18 sts
R 18-21: 1 sc in each st = 18 sts
R 22: *1 sc, sc2tog* 6 times = 12sts R 23: 1 sc in each st = 12 sts
Stuff arm and sew in place on body
Foot and leg: (make 2)
With pink yarn Chain 8
R 1: In second chain from hook make 1 sc (place marker in this st) then 1 sc in next 5 sts, 3sc in last chain. Working on other side of chain: 1 sc in next 5 sts, 2 sc in last st = 16 sts
R 2: 2 sc in 2 sts, 1 sc in 3 sts, 2 sc in next 5 sts, 1 sc in 3 sts, 2 sc in remaining 3 sts. = 26 sts
R 3: 2 sc in 3 sts, 1 sc in 6 sts, 2 sc in 6 sts, 1 sc in 7 sts, 2 sc in last 4 sts. = 39 sts
R 4: 2 sc in 4 sts, 1 sc in 10 sts, 2 sc in 8 sts, 1 sc in 16 sts, sl st into last st and change color. = 51 sts
R 5: 1 sc in each st = 51 sts
R 6: working in back loop only, 1 sc in each st = 51 sts
R 7-11: 1 sc in each st = 51 sts
R 12: Sc2tog 4 times, 1 sc in 11 sts, sc2tog 8 times, 1 sc in 12 sts, sc2tog 2 times = 37 sts
R 13: 1 sc in 12 sts, sc2tog 7 times, 1 sc in last 11 sts = 30 sts
R 14: 1 sc in 10 sts, sc2tog 5 times, 1 sc in 10 sts = 25 sts
R 15: 1 sc in 9 sts, sc2tog 4 times, 1 sc in 8 sts = 21 sts
R 16-27: 1 sc in each st = 21 sts
Stuff the foot (not the leg part) sew the legs and the arms on to the body. Sew the head securely on top of the body.
Scarf:
With 6mm size hook, chain 55, in second chain from hook make 1 sc in each st.
And if this was a pattern for you, I would love if you had a look at some of these designs, all free crochet patterns of course 🙂
Go to Lamb crochet pattern
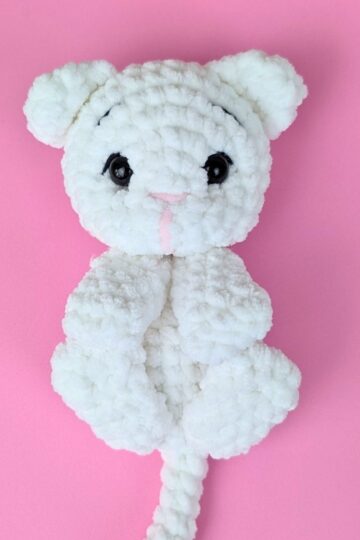
Have a look at Kitten, stuffed animal crochet pattern
or check out my French Bulldog, dog crochet pattern
You can also go back to the homepage to discover more categories and features