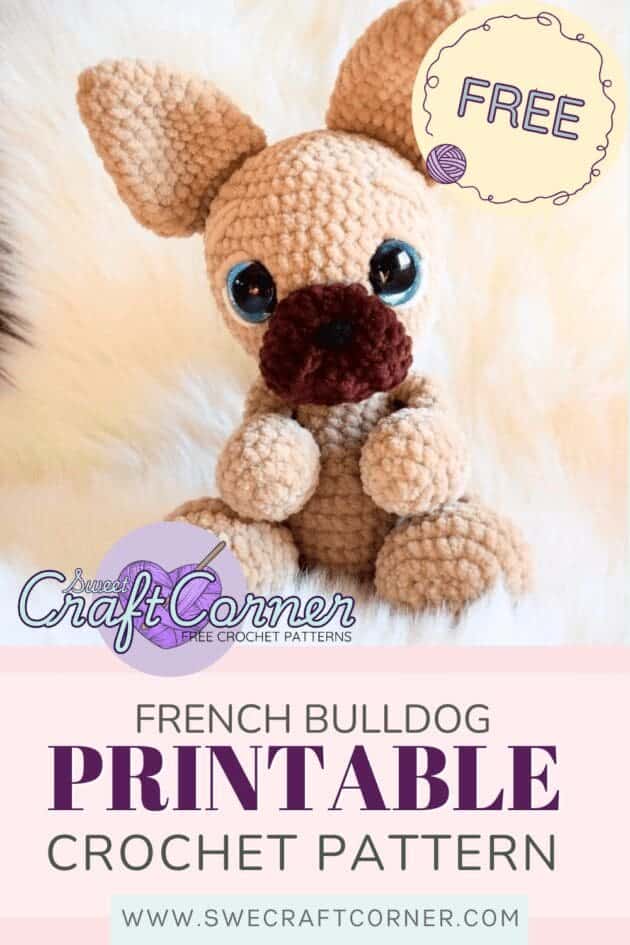
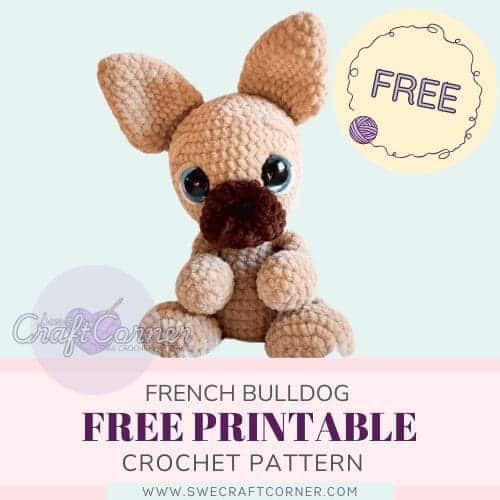
How to crochet a French Bulldog – Free Crochet Pattern
This is my French bulldog crochet pattern. A stuffed animal for the child to play and cuddle with. The big eyes and huge ears give it that extra puppy look. It's made with a super soft chenille yarn and cotton yarn.
If you love to crochet stuffed animals and toys as much as I do, I suggest you have a look at some of my other free patterns!
Step-by-step pictures!
Love bulldogs? This free French bulldog crochet pattern lets you make your very own adorable stuffed animal bulldog! Perfect for lovers of crochet and dogs! Make this adorable crochet plushie with the free printable pattern below! As a member with access to exclusive content you can also access the useful step-by-step picture tutorial at the end. The pictures will show you how to make your very own stuffed animal!
Lamb comfort blanket crochet pattern
A crochet lovey in the form of an adorable crochet bulldog lovey, is also available as a free crochet pattern here. This is the perfect pattern for a baby boy lovey, comfort blanket
If you love the pattern please share the link with your friends, I would be so happy if you did!
This post may contain affiliate links and ads, which means I may earn a small commission if you make a purchase through them at ABSOLUTELY no extra cost to you. But these links and ads are what makes it possible for me to provide you with this PRINTABLE crochet pattern for free! Thank you for supporting Swecraftcorner!
To make this cute crochet lamb stuffed animal you will need the following materials:
Yarn: Chenille yarn approx 150 gr for base color and another color for nose (1 skein is 100gr/120m)
Crochet Hook: 4,0mm
Tapestry Needle:
Scissors
Stitch Markers
Safety eyes 25mm
Safety nose 15mm
Fiber fill
You can check out my collected pattern info below if you need more guidance when working with one of my patterns.
If you need any help or clarification on the terms I use you can see them below. All of my original designs are written using US crochet terms
All crochet patterns on this blog are copyrighted and for personal use only. You may sell finished items made from these patterns in small quantities (no mass production). Full credit for the design must be given to swecraftcorner. Please do not reproduce, share, or claim this pattern as your own.
© 2025 Swecraftcorner. All rights reserved.
And if this was a pattern for you, I would love if you had a look at some of these designs, all free crochet patterns of course 🙂
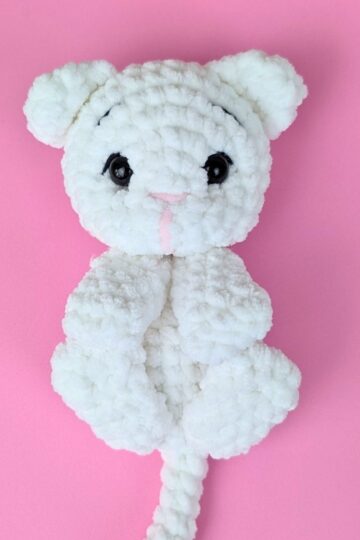
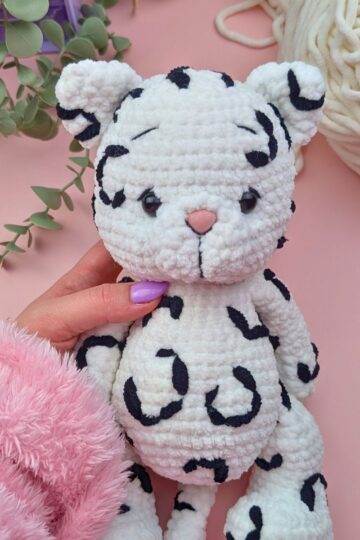
Have a look at Kitten, stuffed animal crochet pattern
or check out my Lamb, Free crochet pattern
You can also go back to the homepage to discover more categories and features
Materials
Yarn: Baby chenille approx 150 gr for base color and another color for nose (1 skein is 100gr/120m)
Hook: 4,0mm
Safety eyes 25mm
Safety nose 15mm
Toy stuffing
A large eyed needle
Scissors
Legs:
Make 2.
1. 5 ch, in second from hook, make: 2 sc, 1 sc in 2 sts, 5 sc in last st, now working on other side of chain, 1 sc in 3 sts (12)
2. 2 sc in 2 sts, 1 sc in 2 sts, 2 sc in 5 sts, 1 sc in 3 sts (19)
3. *2 sc, 1 sc in 1 sts* x2, 1 sc in 4 sts, *2 sc, 1 sc* x3, 1 sc in 5 sts (24)
4. 1 sc in each st (24)
5. 1 sc in each st (24)
6. 1 sc in 11 sts, *sc2tog, 1 sc* x 3, 1 sc in 4 sts (21)
7. 1 sc in 11 sts, *sc2tog* x 3, 1 sc in 4 sts (18)
8. *sc2tog, 1 sc* x6 (12)
9. 1 sc in each st (12)
Stuff the foot firmly to here!
10. 1 sc in each st (12)
11. 1 sc in each st (12)
12. 1 sc in each st (12)
13. 1 sc in each st (12)
14. 1 sc in each st (12)
15. 1 sc in each st (12)
16. 1 sc in each st (12)
17. Make 1 sc in each st until you have made a st in center back, fold the leg and crochet through both sides, 1 sc in 6 sts.
Weave in your ends and make the second leg the same way.
The pictures show how you make round 17, this is also the same for the last round of the arms.
Arms:
Make 2.
1. 6 sc in mr (6)
2. 2 sc i each st (12)
3. *1 sc, 2 sc in st* x 6 (18)
4. 1 sc in each st (18)
5. 1 sc in each st (18)
6. *1 sc, sc2tog* x 6 (12)
7. 1 sc in each st (12)
8. *sc2tog, 1 sc in 4 sts* x2 (10)
Stuff the hands firmly to here!
9. 1 sc in each st (10)
10. 1 sc in each st (10)
11. 1 sc in each st (10)
12. 1 sc in each st (10)
13. 1 sc in each st (10)
14. 1 sc in each st (10)
15. Make 1 sc in each st until you have made a st in center back, fold the arm and crochet through both sides, 1 sc in 5 sts.
Weave in your ends and make the second arm the same way.
Would you like to save this?
Tail:
1. 6 sc in mr (6)
2. 1 sc in each st (6)
3. 1 sc in each st (6)
4. 1 sc in each st (6)
5. 1 sc in each st (6)
6. 1 sc in each st (6)
7. Fold the tail, crochet through both sides, 1 sc in 3 sts
Fasten your yarn.
Nose:
1. 6 sc in mr (6)
2. *3 sc in 1 st, 1 sc* x3
3. 1 sc, *3 sc in 1 st, 1 sc in 3 sts* x2, 1 sc in 2 sts
4. 1 sc in 2 sts, *3 sc in 1 st, 1 sc in 5 sts* x2, 1 sc in 3 sts
5. 1 sc in 3 sts, now working only in the front loop, make: 1 sc in 17 sts. Now through both loops make 1 sl st and turn.
6. Skip the first st, 1 sc in next st, 1 hdc in 5 sts, sc2tog, 1 sc in next st, sc2tog, 1 hdc in 5 sts, 1 sc in 1 st, turn
7. Skip the first st, 1 sc in next st, 1 hdc in 4 sts, sc3tog, 1 hdc in 4 sts, 1 sc, sl st in last st
Leave a piece of yarn long enough to sew it to the head.
Before sewing the nose to the head, fasten your safety nose in the middle through both layers.
Ears:
Make 2.
1. 6 sc in mr (6)
2. *2 sc, 1 sc* x3 (9)
3. *2 sc, 1 sc in 2 sts* x3 (12)
4. *2 sc, 1 sc in 3 sts* x3 (15)
5. *2 sc, 1 sc in 4 sts* x3 (18)
6. 1 sc in each st (18)
7. 1 sc in each st (18)
8. 1 sc in 7 sts, 2 hdc in 2 sts, 1 sc in 9 sts (20)
9. 1 sc in 6 sts, 1 hdc in 1 sts, 1 dc in 4 sts, 1 hdc, 1 sc in 8 sts (20)
10. 1 sc in 7 sts, 1 hdc in 4 sts, 1 sc in 9 sts (20)
11. 1 sc in 7 sts, sc2tog x2, 1 sc in 9 sts, now fold the ear and crochet through both sides, 1 sc in 10 sts, leave a piece of yarn long enough to sew the ear to the head.
Body and head:
1. 8 sc in mr (8)
2. 2 sc in each st (16)
3. *1 sc in 1 sts, 2 sc* x 8 (24)
4. *1 sc in 2 sts, 2 sc* x 8 (32)
5. 1 sc in each st (32)
6. 1 sc in 9 sts, *2 sc, 1 sc in 3 sts* x 4, 1 sc in 7 sts (36)
7. 1 sc in each st (36)
8. 1 sc in 3 sts, Crochet with the tail through both the tail and the body 1 sc in 3 sts, then 1 sc in 3 sts on just the body, crochet with the first leg 1 sc in 6 sts, now 1 sc in 15 sts on just the body, crochet with the second leg, 1 sc in 6 sts (36)
9. 1 sc in each st (36)
10. 1 sc in each st (36)
11. 1 sc in 17 sts, *sc2tog* x 6, 1 sc in 7 sts (30)
12. *sc2tog, 1 sc in 2 sts* x 4, 1 sc in 10 sts, sc2tog, 1 sc in 2 sts (25)
13. 1 sc in 16 sts, sc2tog, 1 sc in 7 sts (24)
14. *sc2tog, 1 sc in 2 sts* x 6 (18)
15. 1 sc in each st (18)
16. 1 sc in 5 sts, now crochet the first arm with 1 sc in 5 sts, 1 sc in 5 sts on just the body, with second arm 1 sc in 3 sts, make the first 2 sts of next round through the arm
17. 1 sc in each st (18)
Make 1 sc in 3 sts so your rounds now start center back, place a marker in the next st.
18. *2 sc, 1 sc in 2 sts* x 6 (24)
19. *2 sc, 1 sc in 3 sts* x 6 (30)
20. *2 sc, 1 sc in 4 sts* x 6 (36)
21. 1 sc in 4 sts, *2 sc, 1 sc in 5 sts* x 5, 2 sc, 1 sc (42)
22. *1 sc in 6 sts, 2 sc * x 6 (48)
23. 1 sc in each st (48)
24. 1 sc in each st (48)
25. 1 sc in each st (48)
26. 1 sc in each st (48)
27. 1 sc in each st (48)
28. 1 sc in each st (48)
29. 1 sc in each st (48)
30. 1 sc in each st (48)
31. *sc2tog, 1 sc in 6 sts* x6 (42)
32. 1 sc in 3 m, *sc2tog, 1 sc in 5 sts* x5, 1 sc in 2 sts (36)
33. *1 sc in 4 sts, sc2tog* x6 (30)
34. *1 sc in 3 sts, sc2tog* x6 (24)
35. *1 sc in 2 sts, sc2tog* x6 (18)
Fasten your safety eyes between round 27 and 28, with 9 stitches in between, then stuff the body and head firmly.
36. *1 sc, sc2tog* x6 (12)
37. *sc2tog* x6 (6), sew the hole closed and weave in your ends.
Sew the nose where you want it placed, then the same with the ears, make sure to fasten all your ends.